
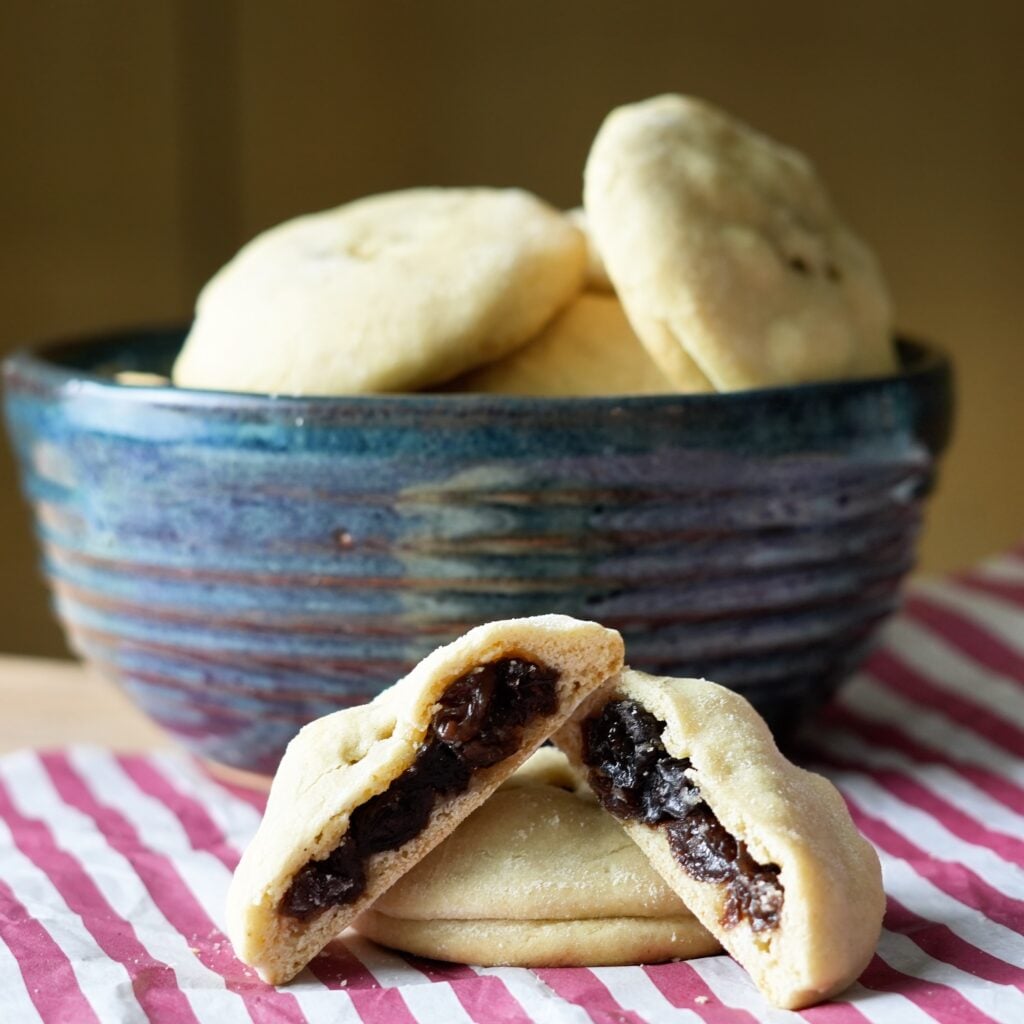
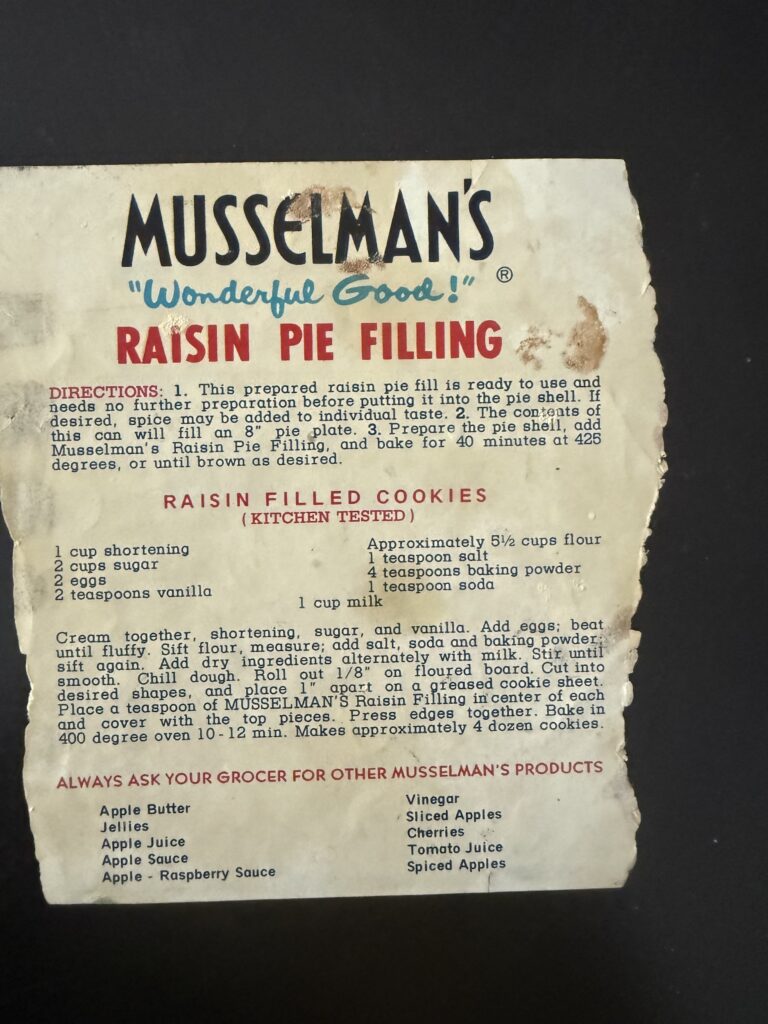
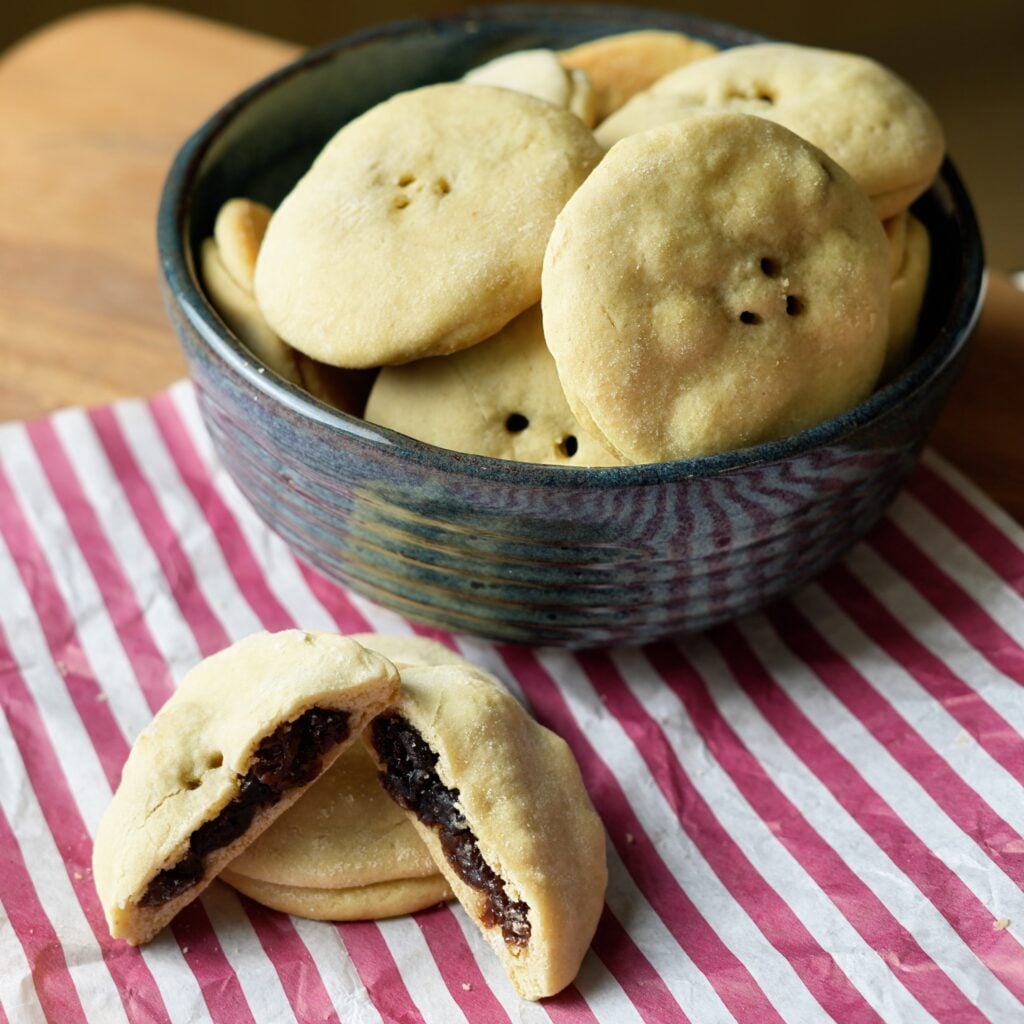
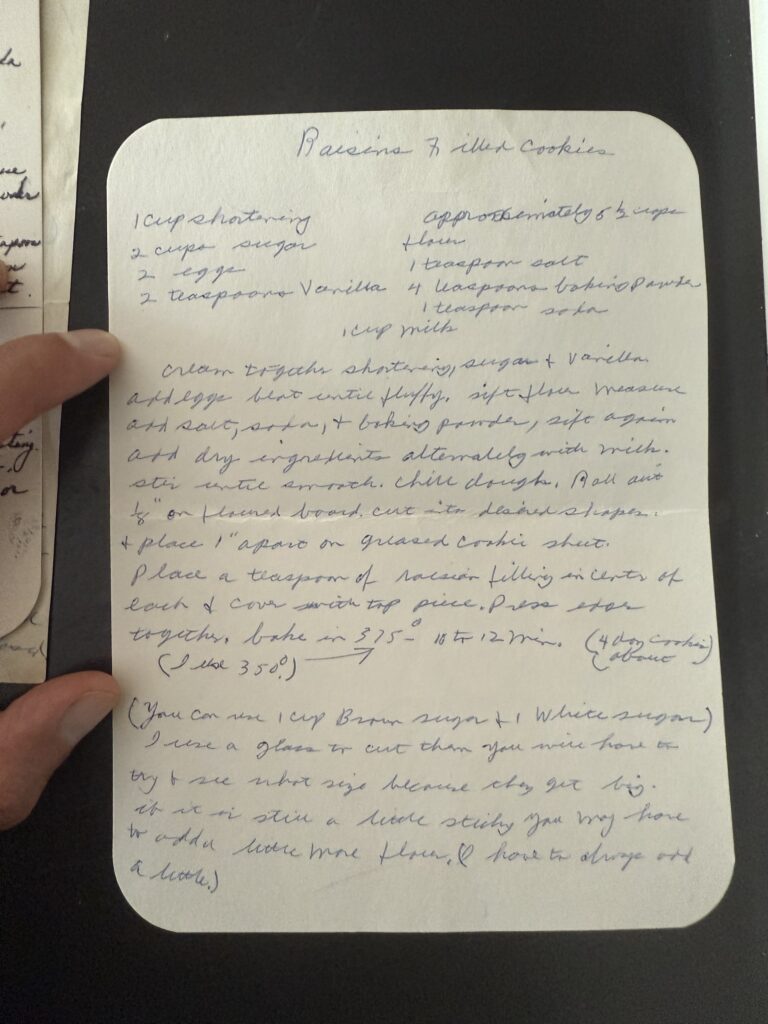
These old-fashioned raisin filled cookies come straight from my great–grandmother‘s recipe collection. They are soft, cake-like cookies filled with a thick, sweet raisin filling, almost like a homemade Fig Newton crossed with a little hand pie.
This is not a quick shortcut cookie, and honestly, that is part of why I love it. The raisin filling needs time to cook and cool, and the dough needs time to chill before you roll it out. It is the kind of cookie that feels like a real holiday baking project.
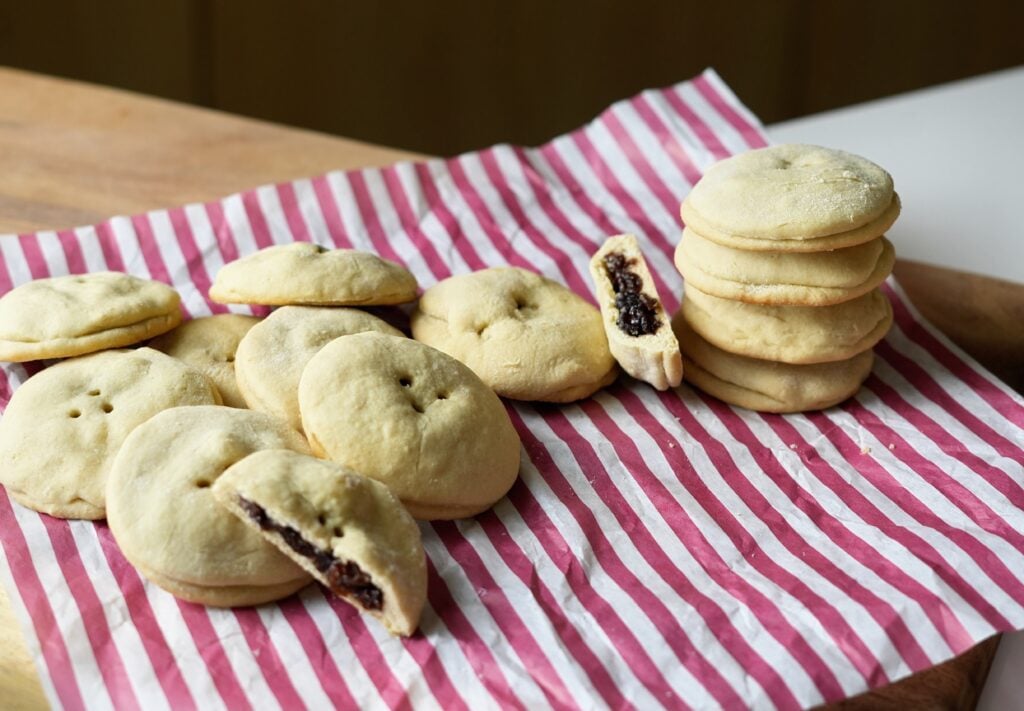
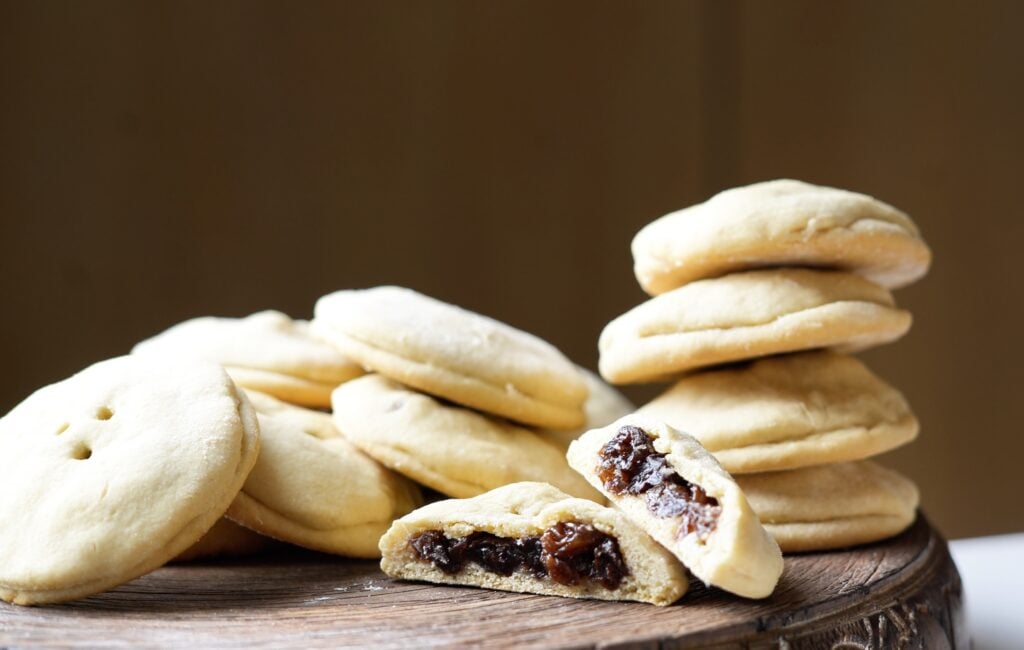
The finished cookies are soft, tender, lightly golden around the edges, and filled with a thick jammy center. They are the kind of vintage Christmas cookie that shows up in old family recipe boxes, church cookbooks, and cookie tins that somehow always made their way into the freezer.
If you grew up with raisin filled cookies, you already know how nostalgic they are. If you did not, this is one of those old-fashioned recipes that makes sense after the first bite.
If you love vintage holiday cookies, try these next:
Vintage Sour Cream Cutout Cookies The Ultimate Soft Holiday Cookie
Grandmas 7 Layer Cookies Magic Bars
Grandmas Sand Tarts Pa Dutch Style
The Cold Filling Strategy
The most important part of this recipe is letting the raisin filling cool completely before assembling the cookies.
Warm filling will soften the dough too quickly. That makes the cookies harder to seal and can cause the raisin filling to leak out in the oven.
For the cleanest filled cookies, make the filling first and let it cool all the way down. You can even make it the day before and keep it in the fridge. Cold filling is thicker, easier to scoop, and much easier to seal inside the dough.
Why You'll Love This Recipe
- True Vintage Cookie: This is an old-fashioned family recipe, not a modern shortcut version.
- Soft Cake-Like Dough: The cookie part is tender and slightly puffy, not crisp or snappy.
- Thick Raisin Filling: The filling cooks down into a sweet, jammy center.
- Great Christmas Cookie: These are perfect for holiday cookie trays, tins, and family baking days.
- Freezer Friendly: Raisin filled cookies freeze well and soften beautifully after sitting.

What makes Old-Fashioned Raisin Filled Cookies special?
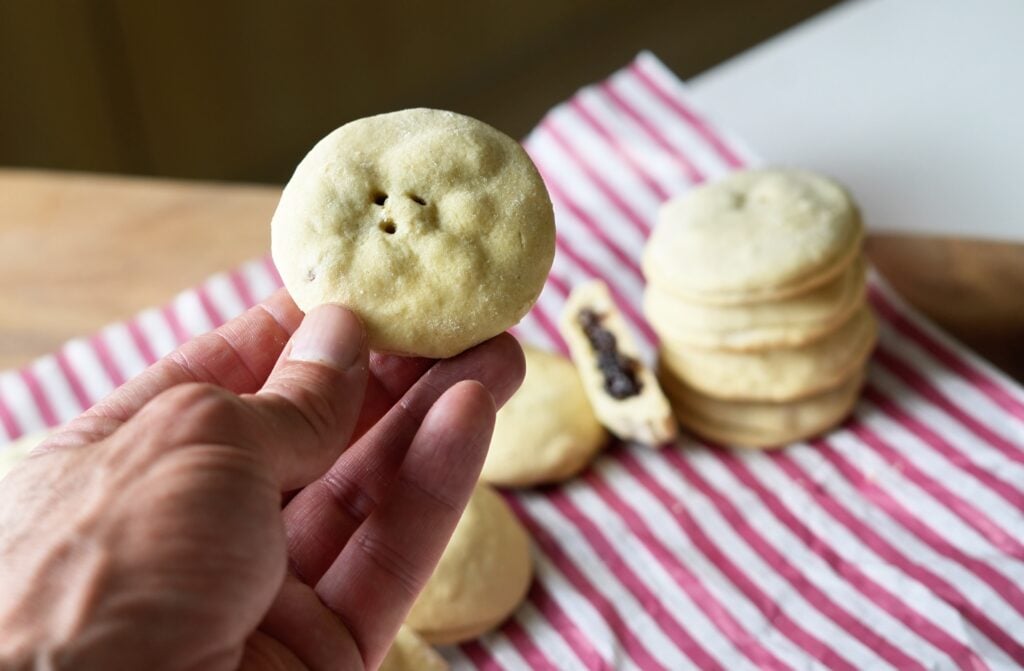
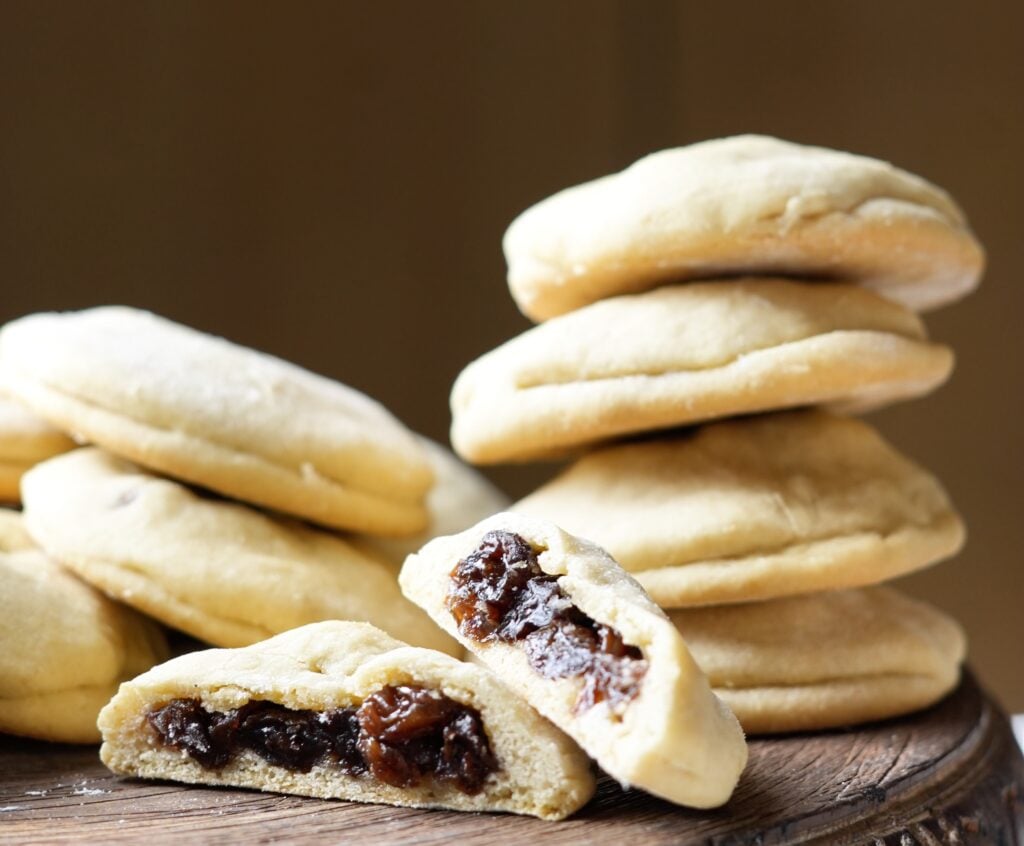
Old-fashioned raisin filled cookies are different from regular cookies because they are almost like small hand pies. You roll out the dough, cut it into circles, add the raisin filling, top with another piece of dough, and seal the edges.
The dough is soft and cake-like, while the filling is thick and sweet. As the cookies sit, the raisin filling softens the inside of the cookie even more. That is why these cookies are often even better the next day.
These are the kind of cookies you see in older Christmas baking traditions, especially in Pennsylvania Dutch, Amish-style, and Midwest family recipe collections. They are simple, old-school, and built around pantry ingredients like raisins, flour, sugar, shortening, milk, and eggs.
Equipment Focus: Why Quality Matters
- Weighted Rolling Pin: This dough is soft but dense once chilled. A weighted pin does the heavy lifting for you, ensuring a perfect 1/8-inch thickness without the need to press down hard and risk tearing the dough.
- Round Cookie Cutter Set: To get that classic look, a sharp 2.5” to 3” cutter is essential. It provides a clean edge that seals much better than a glass or a dull knife ever could.
- Heavy-Bottomed Saucepan: The high sugar content in raisin filling makes it prone to scorching. A heavy-bottomed pan distributes heat evenly, allowing the jam to thicken perfectly without burning.
- Professional Flour Sifter: For the lightest, most “cakey” texture, running your dry ingredients through a sifter aerates the flour and ensures a smooth, lump-free dough.
- Digital Kitchen Scale: Even in old-fashioned baking, precision is king. Weighing your 5.5 cups of flour ensures the dough isn't too sticky or too dry.
- Silicone Spatula Set: Essential for scraping every bit of that precious raisin jam out of the pan and into your cookies.
Ingredient Deep Dive & Strategy
Shortening: Gives the cookies their classic soft texture and helps the dough hold its shape. Butter can be used, but the dough will need to stay very cold.
Granulated Sugar: Sweetens the cookie dough and helps create the tender cake-like bite.
Eggs: Help bind the dough and give the cookies structure.
Milk: Adds moisture and helps create the soft, old-fashioned cookie texture.
All-Purpose Flour: Forms the base of the dough. Add it gradually and avoid adding too much extra flour while rolling.
Baking Powder and Baking Soda: Help the cookies puff slightly instead of baking flat.
Seedless Raisins: Cook down into the thick, sweet filling.
Lemon Juice: Brightens the raisin filling so it does not taste overly sweet.
Flour for the Filling: Thickens the raisin mixture so it stays inside the cookies.
Homemade Old-Fashioned Raisin Filled Cookies Step by Step Instructions
1. Make the raisin filling
In a heavy-bottomed saucepan, combine the raisins, water, sugar, flour, lemon juice, and a dash of salt.
Cook over medium heat, stirring often, until the mixture thickens into a jammy raisin filling.
Remove from heat and let the filling cool completely before using.
Pro Tip: The filling should be cold before you assemble the cookies. Warm filling makes the dough harder to seal.
2. Make the cookie dough
In a large mixing bowl, cream together the shortening, sugar, eggs, and vanilla until light and combined.
Stir in the milk.
In a separate bowl, whisk together the flour, baking powder, baking soda, and salt.
Gradually add the dry ingredients to the wet ingredients until a soft dough forms.
3. Chill the dough
Wrap the dough in plastic wrap and refrigerate for at least 1 hour.
This dough is soft by design, so chilling makes it much easier to roll and cut.
Pro Tip: If the dough still feels too sticky after chilling, work with smaller portions and keep the rest in the fridge.
4. Roll and cut
Preheat the oven to 375°F and line baking sheets with parchment paper.
On a well-floured surface, roll a small portion of chilled dough to about 1/8-inch thickness.
Cut out circles using a round cookie cutter.
5. Fill and seal
Place half of the dough circles on the prepared baking sheets.
Add about 1 teaspoon of cold raisin filling to the center of each circle.
Top with another dough circle and press the edges firmly to seal. You can use your fingers or a fork.
6. Bake
Bake for 10 to 12 minutes, or until the edges are just barely golden.
Do not overbake. These cookies are supposed to stay soft.
7. Cool
Transfer the cookies to a wire rack and let them cool completely. The filling will be hot when they first come out of the oven, so give them time to set.
Troubleshooting & FAQ
Why is my raisin filled cookie dough so sticky?
This is a soft dough, so some stickiness is normal. Chill the dough well, flour your work surface, and roll out small portions at a time. Keep the rest of the dough in the fridge while you work.
Why did my raisin filling leak out?
The filling may have been too warm, or the edges may not have been sealed tightly enough. Let the raisin filling cool completely before assembling, and press the edges firmly with your fingers or a fork.
Can I make the dough ahead of time?
Yes. You can make the dough up to 2 days ahead and keep it wrapped in the refrigerator. Let it sit at room temperature just long enough to roll, but do not let it get too warm.
Can I make the raisin filling ahead of time?
Yes. The filling can be made ahead and stored in the fridge. Cold filling is actually easier to use because it is thicker and less likely to leak.
What kind of raisins should I use?
Standard seedless raisins are the classic choice. Golden raisins can also work if you want a lighter, fruitier flavor.
Do I need to soak the raisins first?
No. The raisins soften while they cook with the water and sugar. They will plump up and turn into a thick filling as the mixture simmers.
Are raisin filled cookies a Christmas cookie?
They are often served as vintage Christmas cookies, especially in older family baking traditions. They also show up in Amish, Pennsylvania Dutch, and Midwest-style recipe collections.
Can I use butter instead of shortening?
Yes, but the dough will spread more easily. If you use butter, keep the dough very cold and work in small batches.
How thick should I roll the dough?
Roll the dough to about 1/8-inch thick. If the dough is too thick, the cookies can taste too bready and the filling gets lost.
Can I freeze raisin filled cookies?
Yes. These cookies freeze very well. Freeze them in a single layer first, then move them to a freezer bag or airtight container.
Substitutions & Variations
| Component | Swap Options |
| Shortening | Unsalted butter (yields a richer flavor, but requires a strictly colder dough). |
| Raisins | Dried currants, chopped dates, prunes, or dried cranberries for a tarter fruit bite. |
| Lemon Juice | Apple cider vinegar (if you need an alternative hit of bright acid). |
| Shape | Use a square pastry cutter for a unique “ravioli” style filled cookie look. |
Storage & Freezing
- Store raisin filled cookies in an airtight container at room temperature for up to 4 days.
- These cookies usually get softer after a day because the raisin filling settles into the cakey dough. That is part of what makes them so good.
- To freeze, place the cooled cookies in a single layer on a baking sheet until firm. Transfer to a freezer-safe bag or container and freeze for up to 3 months.
- Let frozen cookies sit at room temperature for about 15 minutes before eating. You can also warm one in the microwave for 8 to 10 seconds if you want the raisin filling softer.
You Might Also Like
If you love vintage cookies as much as I do, these three hits from the archive are worth checking out next:
- Old Fashioned Toll House Chocolate Chip Cookies Original Style
- Old Fashioned Pineapple Drop Cookies
- The Carter Cookie
The Final Verdict & Share
These old-fashioned raisin filled cookies are soft, nostalgic, and straight from my great-grandmother's recipe collection. They take more time than a basic drop cookie, but the jammy raisin center and tender dough are worth it. Make them once, let them soften overnight, and tag me if you try them.

Old-Fashioned Raisin Filled Cookies (Vintage Christmas Cookie)
Ingredients
- 1 cup shortening or unsalted butter, softened
- 2 cups granulated sugar
- 2 large eggs
- 1 tsp vanilla extract
- 1 cup milk
- 5½ cups all-purpose flour weighing is highly recommended
- 4 tsp baking powder
- 1 tsp baking soda
- 1 tsp salt
- 1 lb seedless raisins
- 1 cup water
- 1 cup granulated sugar for filling
- 2 tbsp all-purpose flour for thickening
- 2 tsp lemon juice
- 1 dash salt for filling
Equipment


Method
- In a heavy-bottomed saucepan, combine raisins, water, sugar for filling, flour for filling, lemon juice, and a dash of salt. Cook over medium heat, stirring constantly, until completely thickened into a jam. Cool completely before assembling.
- In a large mixing bowl, cream together the shortening, sugar, eggs, and vanilla extract until light and fluffy. Stir in the milk until combined.
- In a separate bowl, whisk together the sifted flour, baking powder, baking soda, and salt. Gradually add the dry ingredients to the wet mixture to form a soft cookie dough.
- Wrap the soft cookie dough in plastic and chill in the refrigerator for at least 1 hour. Keep the dough cold while working—only roll out small portions at an absolute time.
- Preheat your oven to 375°F (190°C). Line large baking sheets with parchment paper.
- On a heavily floured board, roll the chilled dough to 1/8-inch thickness using a rolling pin. Cut out circles with a round cookie cutter.
- Place half of the dough circles onto the prepared baking sheets. Add 1 teaspoon of completely cold raisin filling into the direct center of each circle. Top with a second dough circle and firmly seal the outer edges with your fingers or a fork.
- Bake for 10–12 minutes until the outer edges are just barely golden. Transfer immediately to wire racks to cool completely so the filling can set.
Nutrition
Notes
Tried this recipe?
Mention or tag @bakedlean!Related Posts
One response to “Old-Fashioned Raisin Filled Cookies (Vintage Christmas Cookie)”


Reminds me of my great granmda


Leave a Reply