These Pennsylvania Dutch Sand Tart Cookies are thin, crisp, buttery sugar cookies that bake up perfectly every single time. The recipe comes directly from my grandma's handwritten recipe cards, originating from the deep traditions of Lancaster County and its historical Mennonite population. While her original version used brown sugar, I bake mine with white sugar for a lighter color and a cleaner, more pronounced butter flavor. They carry the true essence of nostalgic holiday baking and are a must-have for classic holiday cookie platters.
The secret to these cookies isn't a long list of complicated ingredients. It comes down to temperature and technique. Keeping the cookie dough very cold, rolling it out extremely thin, and baking on parchment for exactly ten minutes yields the signature crisp snap that makes these a Christmas classic.
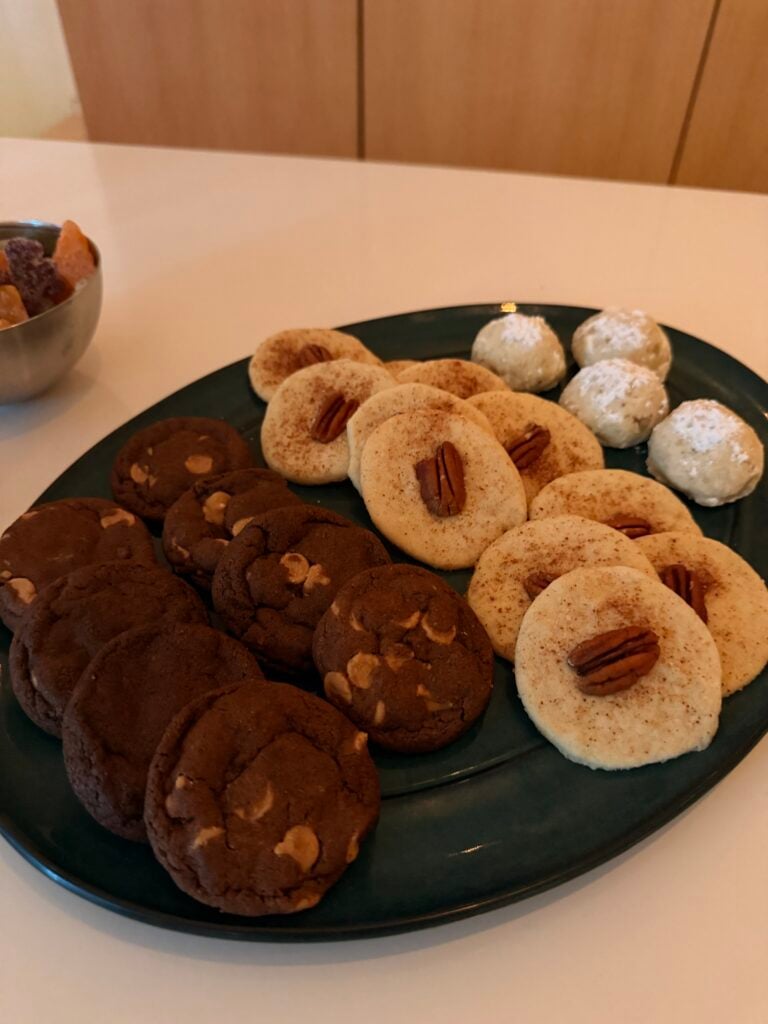
If you're building your holiday cookie tin, try my:
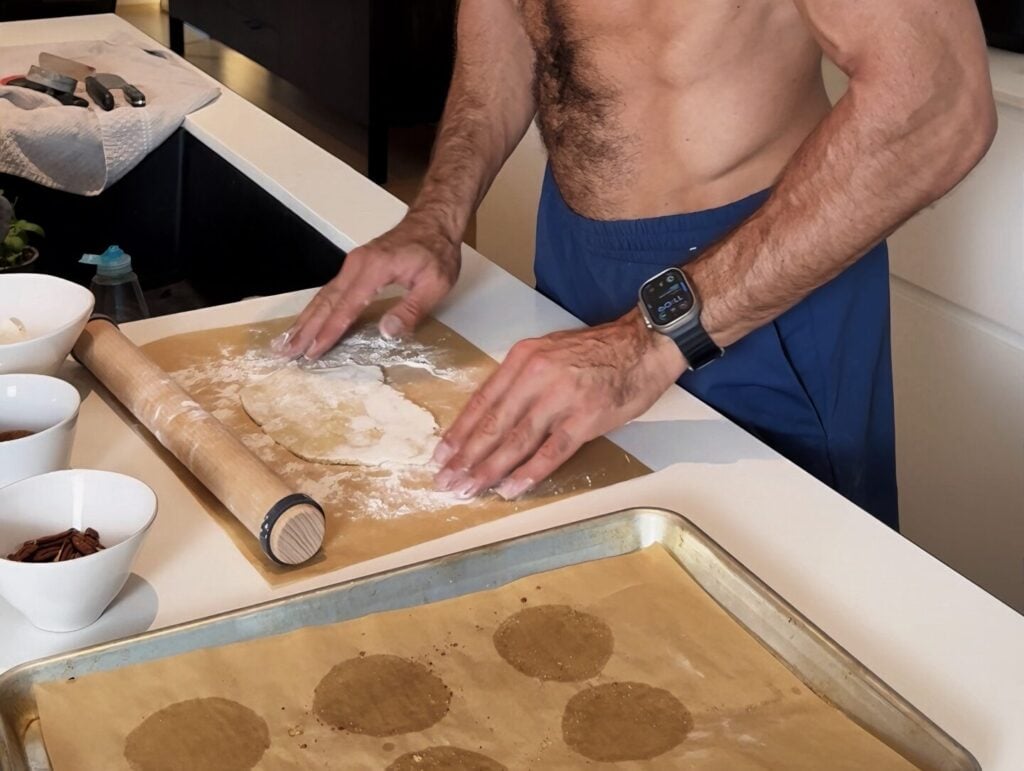
The magic of this recipe lies entirely in the dough management. Grandma's technique of chilling the dough overnight is non-negotiable. Cold dough allows the flour to fully hydrate and the butter to firm up, which prevents spreading in the oven. Because this is a high-butter dough, it will soften rapidly at room temperature. Working in small batches and flouring your surface heavily ensures you can roll the dough to a paper-thin 1/8-inch thickness. That thinness is what creates the definitive crisp, fragile crunch of a proper sand tart.
Why You'll Love This Recipe
Incredible Texture: The paper-thin roll gives these cookies a satisfying crunch and snap that stands out on a cookie tray.
Make-Ahead Convenience: The cookie dough thrives on cold storage, making it perfect to mix up days before you actually plan to bake.
Holiday Gifting: Because they are dry and crisp, they stack beautifully and survive shipping without crumbling into a mess.
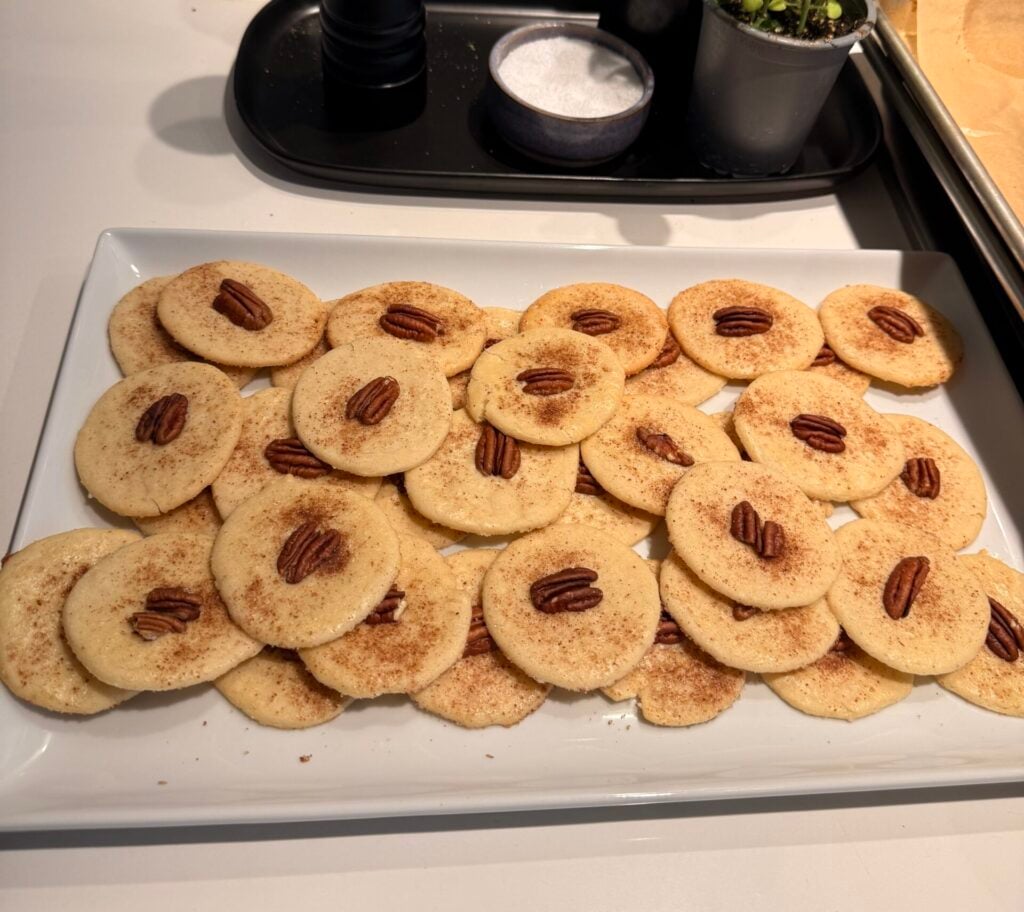
True Heritage Flavor: The combination of pure butter, a simple egg wash, and toasted pecans delivers an authentic, old-fashioned flavor profile.
What makes Pennsylvania Dutch Sand Tart Cookies a True Sand Tart?
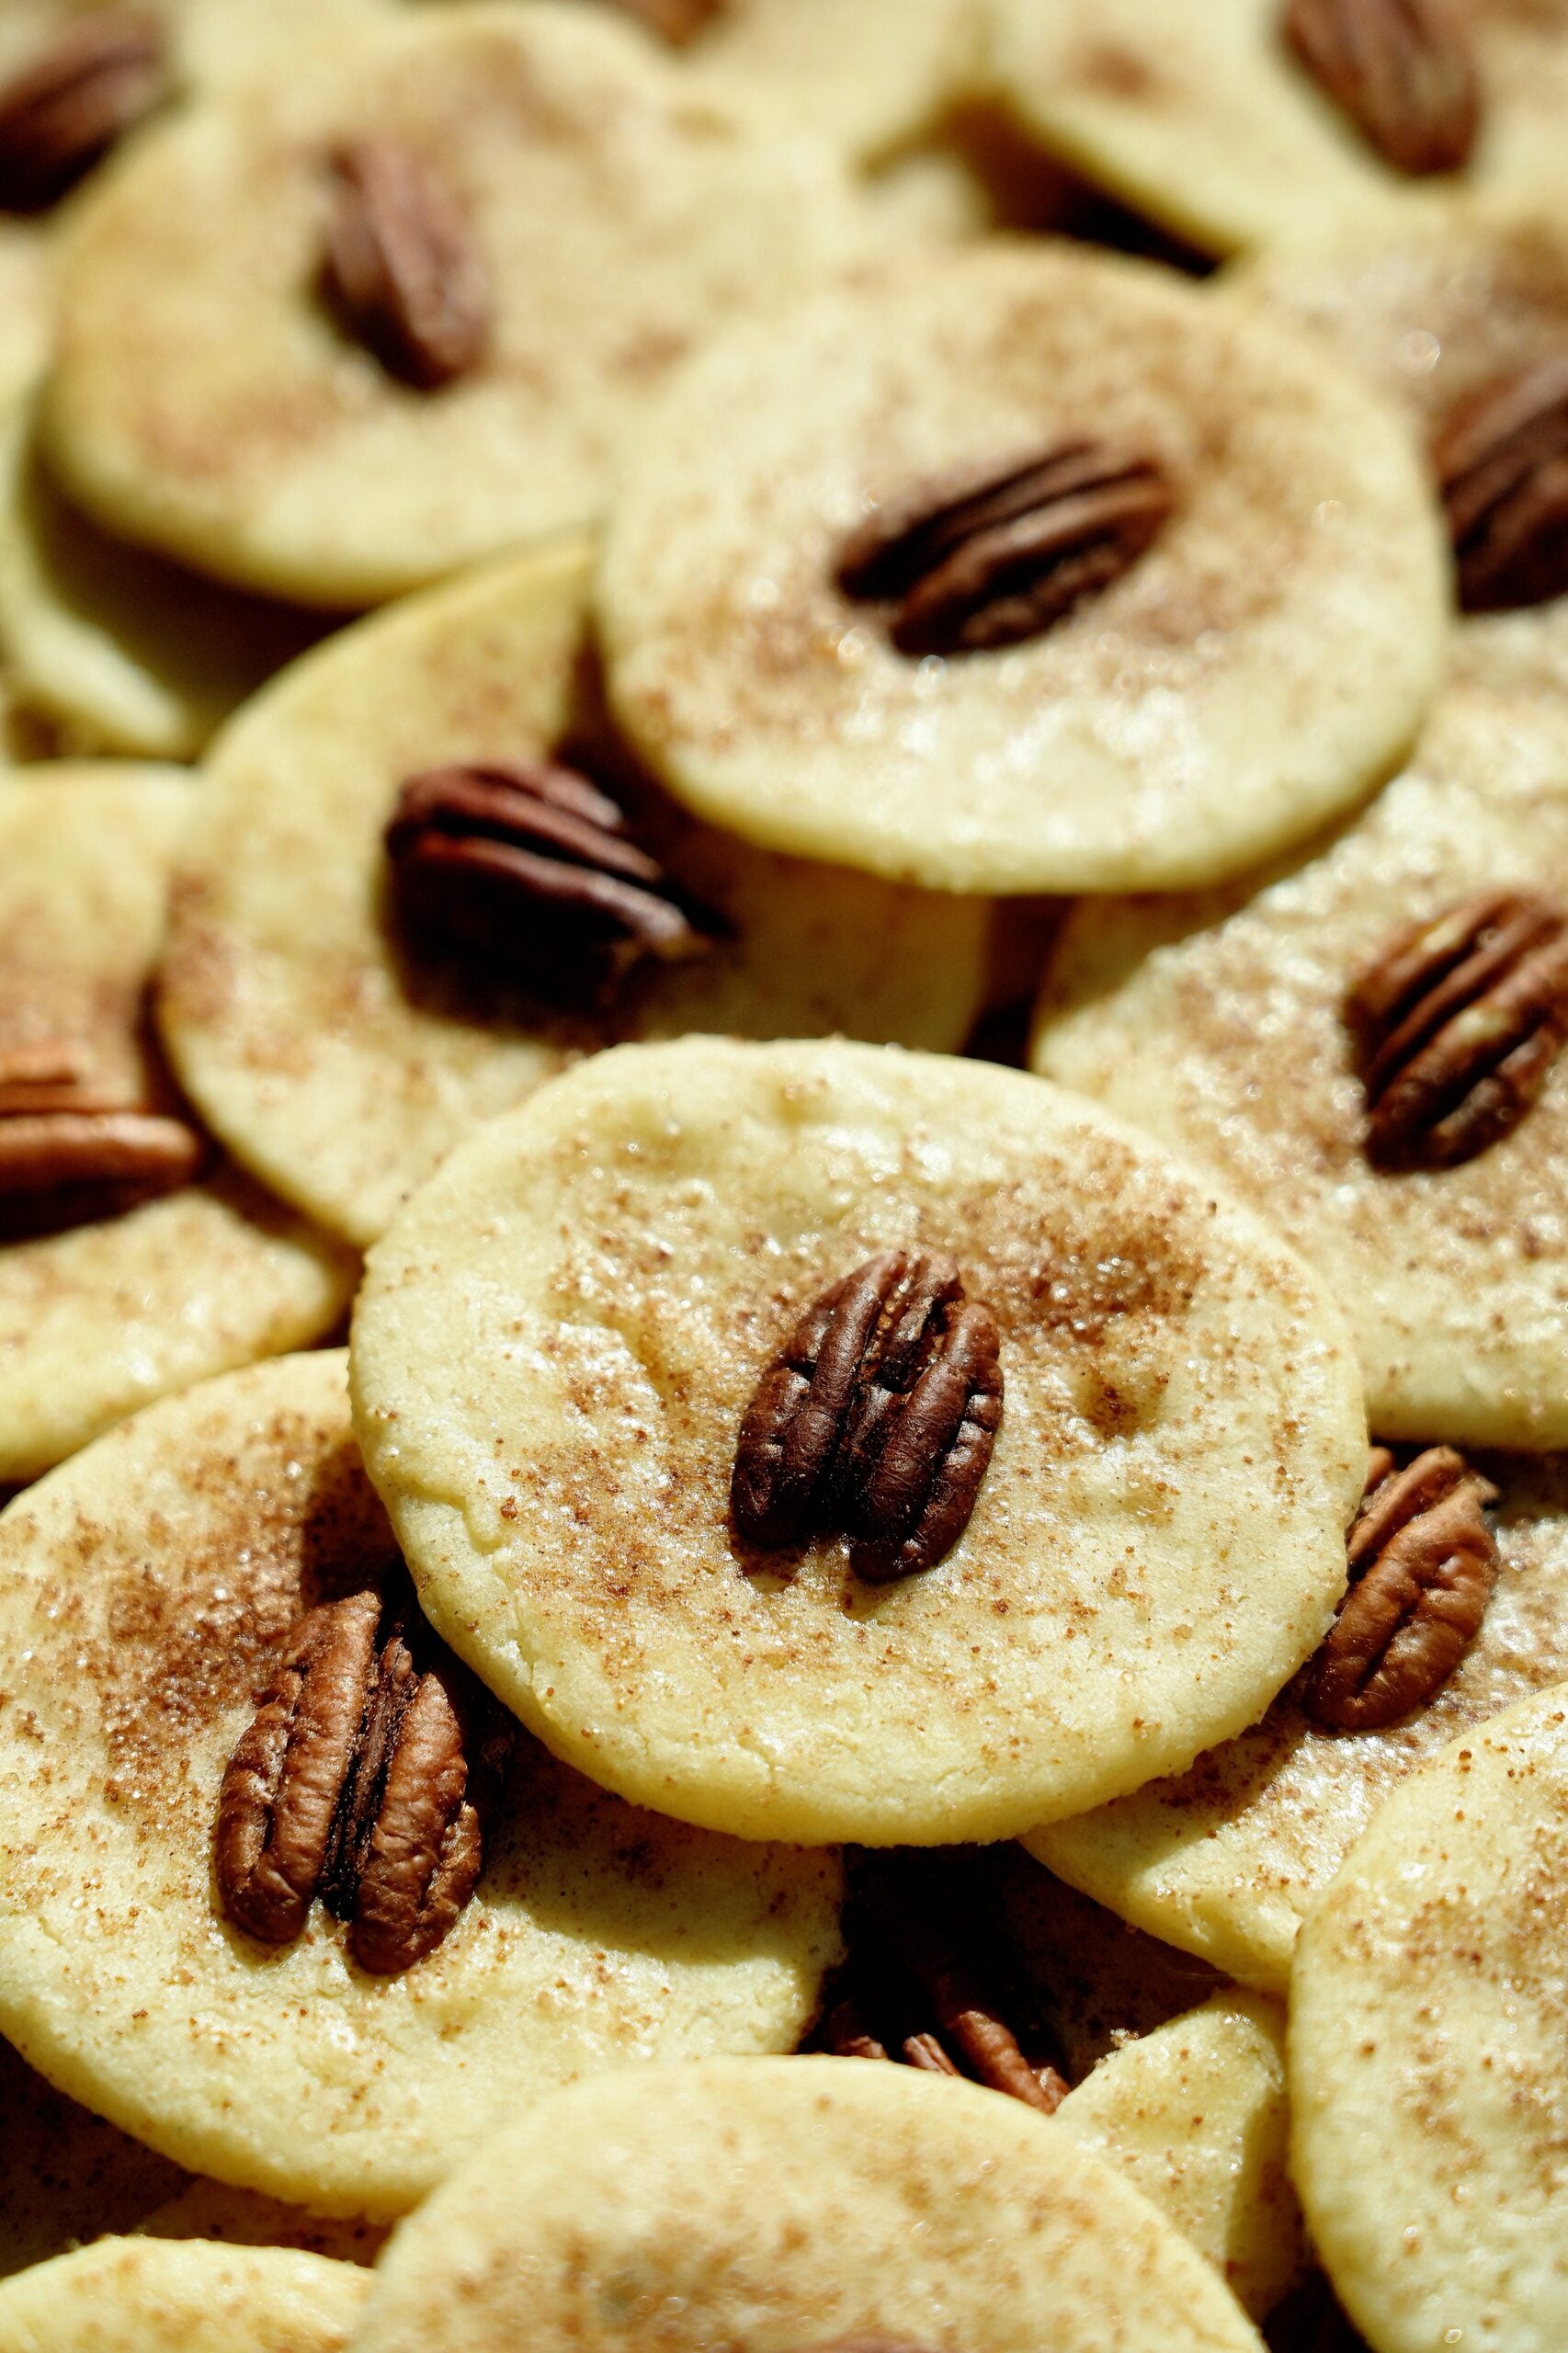
If you are wondering what separates this from a standard holiday bake, it comes down to thickness and topping. Sugar cookies are generally thick, soft, and frosted. A true Pennsylvania Dutch Sand Tart is rolled aggressively thin—almost translucent before baking. It is then painted with a light egg wash and generously dusted with cinnamon sugar. This topping creates a slightly caramelized, sandy texture on the surface of the cookie. When baked, it should snap cleanly rather than bend.
Key Equipment Focus
Having the right tools on hand prevents frustration when working with a delicate, temperature-sensitive dough.
Digital Scale: Weighing your flour ensures you do not pack the measuring cup, which leads to tough, dry dough.
Heavy Duty Baking Half-Sheet: Thin cookies burn easily on thin, cheap pans. A heavy-duty pan distributes heat evenly.
Rolling Pin: A sturdy, heavy rolling pin is essential for flattening the chilled dough to the required 1/8-inch thickness.
Hand Mixer: Essential for creaming the butter and sugar together until they reach the light, fluffy stage necessary for proper structure.
Ingredient Deep Dive (The Classics)
Unsalted Butter: The primary fat and flavor driver. Using unsalted butter allows us to control the sodium content and ensures a pure, sweet cream flavor.
Sugar: Provides sweetness and crispness. Grandma used brown sugar for a deeper molasses flavor, but white sugar yields a lighter, crisper cookie with cleaner edges. Note: We do not use confectioners' sugar in this dough, as it alters the traditional snap.
All-Purpose Flour: The structural backbone. Sifting the flour removes lumps and aerates it, ensuring a delicate, tender crumb rather than a dense brick.
Eggs: We use two in the dough for moisture and binding, and reserve the third strictly as an egg wash. The wash acts as the glue for the cinnamon sugar and nuts.
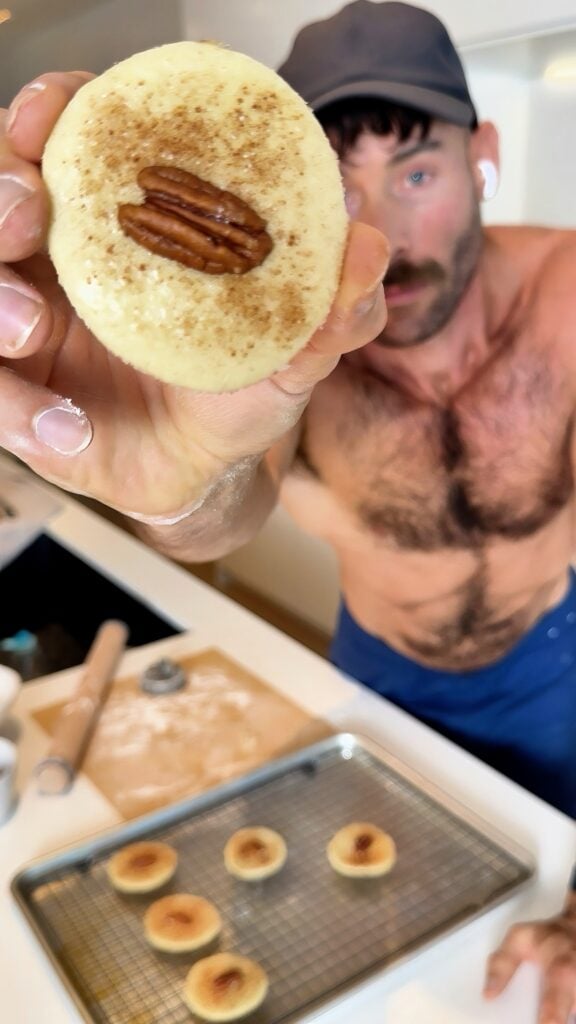
Pecans: Placing a nut half on top before baking toasts the nut in the oven, releasing essential oils that contrast perfectly with the sweet dough.
Grandma's Sand Tarts Step by Step Instructions
1. Cream the Base Cream the butter and sugar together until light and fluffy. Beat in 2 eggs until smooth.
Pro Tip: Make sure your butter is softened to room temperature, but not melting or greasy. It should yield to a gentle press but hold its shape.
2. Whisk the Dry Ingredients In a separate bowl, whisk the flour, baking powder, and salt. Add the dry mixture gradually to the wet mixture. If the dough seems too dry or crumbly, add 1–2 tablespoons milk until it comes together.
Pro Tip: Do not overmix once the flour is added. Mix just until the white streaks of flour disappear to prevent tough cookies.
3. Chill the Dough Wrap the dough tightly in plastic wrap and refrigerate several hours or overnight.
Pro Tip: The dough must be very cold. Flattening the dough into a disk before wrapping in plastic wrap makes it much easier to roll out later.
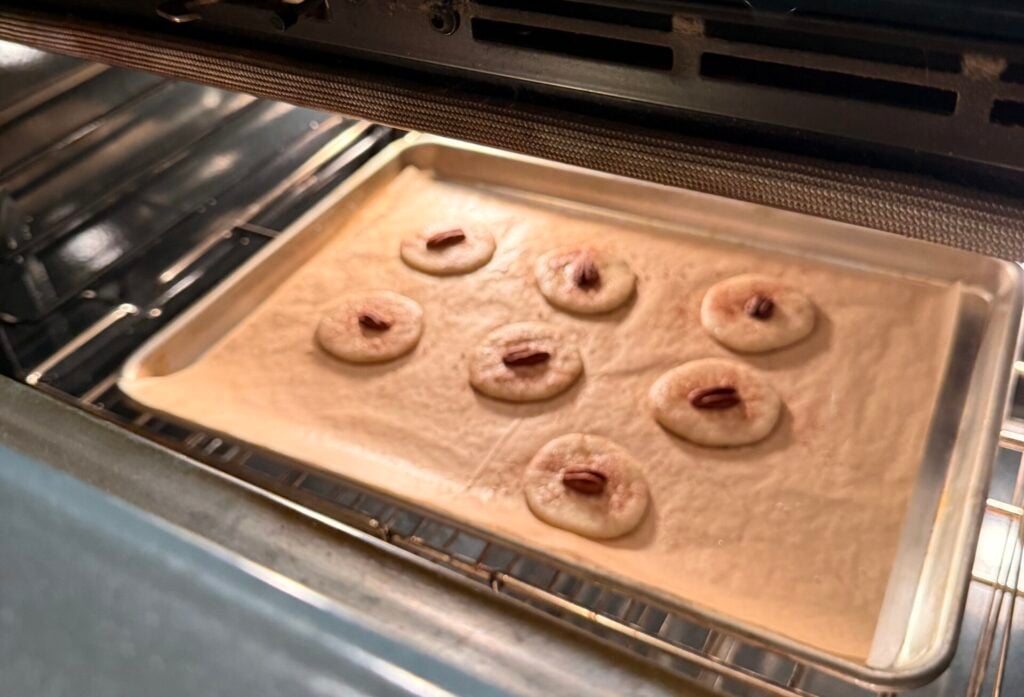
4. Prep the Oven and Pans Preheat the oven to 350°F (175°C). Line baking sheets with parchment paper.
Pro Tip: Never place raw dough on a hot baking sheet. Let your pans cool completely between batches.
5. Roll the Dough Thin Work with a small portion of dough at a time, leaving the rest refrigerated. Flour your surface and rolling pin heavily. Roll the dough very thin, about 1/8 inch or slightly less.
Pro Tip: If the dough starts sticking or tearing, it has gotten too warm. Put it back in the fridge for 15 minutes.
6. Cut and Top Cut shapes using cookie cutters. Brush each cookie lightly with the beaten third egg. Sprinkle generously with cinnamon sugar and top with a pecan half if using.
Pro Tip: A light hand with the egg wash is key. If it pools around the base of the cookie cutter shape, the edges will burn.
7. Bake and Cool Bake for exactly 10 minutes or until the edges are lightly golden. Do not overbake. Let the cookies cool on the pan for 1–2 minutes, then transfer to a wire rack to cool fully.
Pro Tip: Watch the first batch like a hawk. Because these are rolled so thin, the difference between perfectly golden and burnt is about 60 seconds.
Troubleshooting & FAQ
What is the difference between a sand tart and a sugar cookie? Sugar cookies are generally rolled thicker, resulting in a soft, chewy center, and are often finished with royal icing. Sand tarts are rolled to a maximum of 1/8-inch thickness, baked until they have a distinct crunch, and topped only with an egg wash and cinnamon sugar.
Why are they called sand cookies? How did sand tarts get their name? The name originates from the visual and textural elements of the cookie. The generous dusting of cinnamon sugar on top resembles grains of sand, and the crumb of the cookie itself has a delicate, sandy, melt-in-your-mouth quality that has made them one of our favorite recipes for generations.
Why did my cookies spread flat? Your dough was too warm before it went into the oven, or your butter was overly soft when you creamed it. Always chill the dough thoroughly and work in small batches so the butter remains solid before hitting the hot oven.
Why are my cookies tough? Toughness comes from two things: over-measuring the flour or overworking the dough. If you re-roll the same scrap of dough too many times, the gluten develops and turns a crisp cookie into a tough, hard one.
Do I have to chill the dough? Yes. Skipping the chilling step will result in a sticky mess that is impossible to roll thin. The flour needs time to hydrate, and the butter needs time to firm up.
Make-Ahead & Freezing Instructions
Can sand tart cookies be frozen? Yes, this cookie dough freezes exceptionally well. Form the freshly made dough into two flat disks, wrap them tightly in a double layer of plastic wrap, and place them in a zip-top freezer bag. Freeze for up to 3 months. Thaw overnight in the refrigerator before rolling.
Storing Baked Cookies: Because these are a crisp cookie, they have an excellent shelf life. Store fully cooled cookies in an airtight container at room temperature for up to two weeks. This makes them the ultimate addition to holiday cookie platters. If they begin to soften, you can crisp them back up in a 300°F oven for 3-4 minutes.
Substitutions Table
Component
Swap Options
Unsalted Butter
Margarine (Will alter the classic flavor and yield a slightly softer texture)
White Sugar
Brown Sugar (Produces a darker cookie with a deeper, molasses-forward flavor, just like Grandma's original)
Pecans
Walnuts, sliced almonds, or omit entirely for a nut-free cookie
Milk
Heavy cream or half-and-half if the dough requires moisture to bind
You Might Also Like
If you are looking to round out your seasonal baking list with more generational classics, these are the recipes to try next.
This is the exact vintage recipe that has graced my family's table for decades, and it belongs in your permanent rotation. Get your rolling pin ready, respect the chilling time, and watch these disappear from the cookie tin. If you bake a batch of these Pennsylvania Dutch Sand Tarts, drop a rating and let me know how they turned out in the comments below!
How To Make Sand Tart Cookies (Traditional Pennsylvania Dutch Recipe)
No ratings yet
These old-fashioned Sand Tarts are thin, crisp, buttery cookies with a sprinkle of cinnamon sugar. My grandma's original recipe called for brown sugar, but I baked them with white sugar. The dough must stay very cold, rolled super thin, and baked for exactly 10 minutes on parchment for the perfect crispness.
Cream butter and sugar until light and fluffy. Beat in 2 eggs.
In a separate bowl, whisk flour, baking powder, and salt. Gradually add to butter mixture until dough comes together. If dough is too dry, add 1–2 tablespoons milk.
Wrap dough tightly in plastic wrap and refrigerate several hours or overnight. Keep dough very cold for rolling.
Preheat oven to 350°F (175°C). Line baking sheets with parchment paper.
Work with a small portion of dough at a time, keeping the rest in the fridge. Flour rolling surface and pin heavily. Roll dough very thin (about 1/8-inch or less).
Cut shapes with cookie cutters. Brush lightly with beaten egg wash. Sprinkle generously with cinnamon sugar and top with a pecan half if desired.
Bake for exactly 10 minutes on parchment, until lightly golden at the edges. Cool on pan 1–2 minutes before transferring to wire rack.
The dough must stay very cold and is easiest to work in small batches. Use lots of flour when rolling — it softens quickly and sticks. Rolling thin and baking for exactly 10 minutes gives the signature crispness. Grandma's recipe called for brown sugar, but I used white sugar. Parchment prevents sticking and helps cookies bake evenly.


Leave a Reply