
I wanted an apple dessert that had all the good parts of apple pie without actually making pie dough, and these bars were exactly what I had in mind.
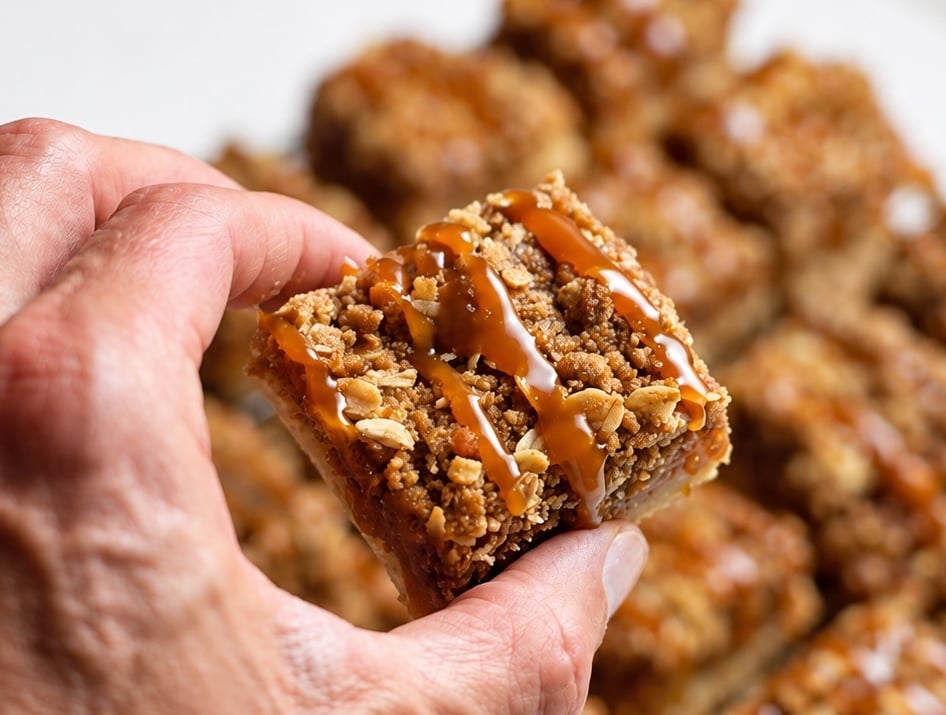
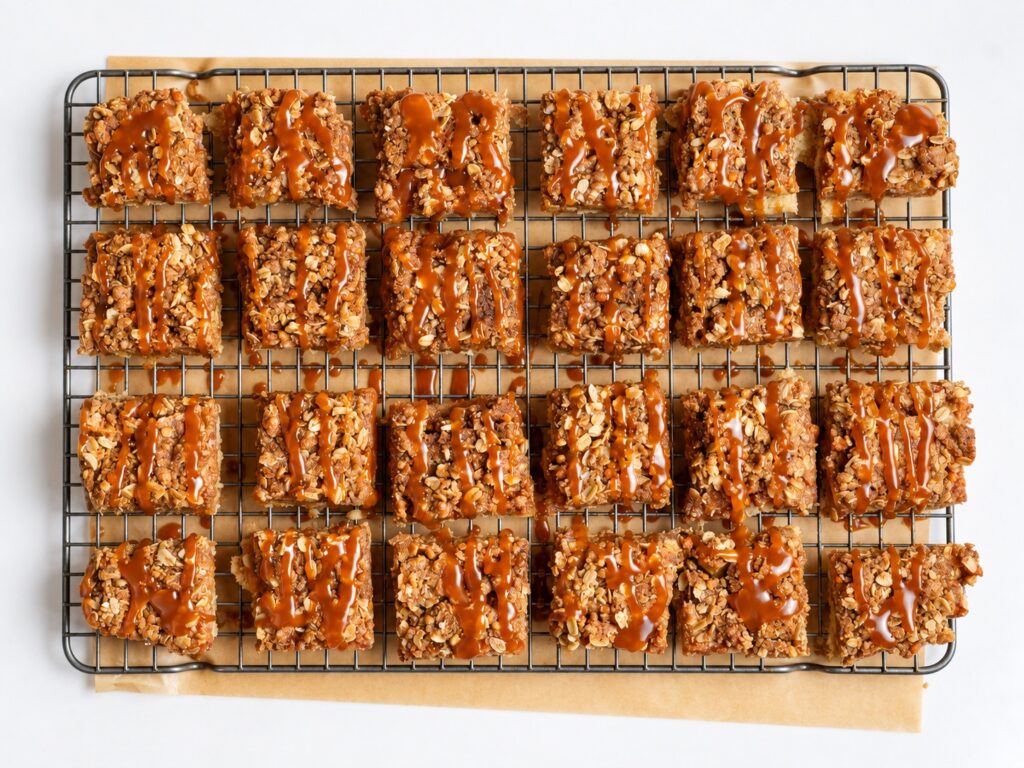
They have three layers: a buttery gluten-free shortbread crust, a thick layer of cinnamon apples, and a brown sugar oat streusel made with Kodiak Classic Rolled Oats. I finish them with salted caramel, which is completely optional but very good here.
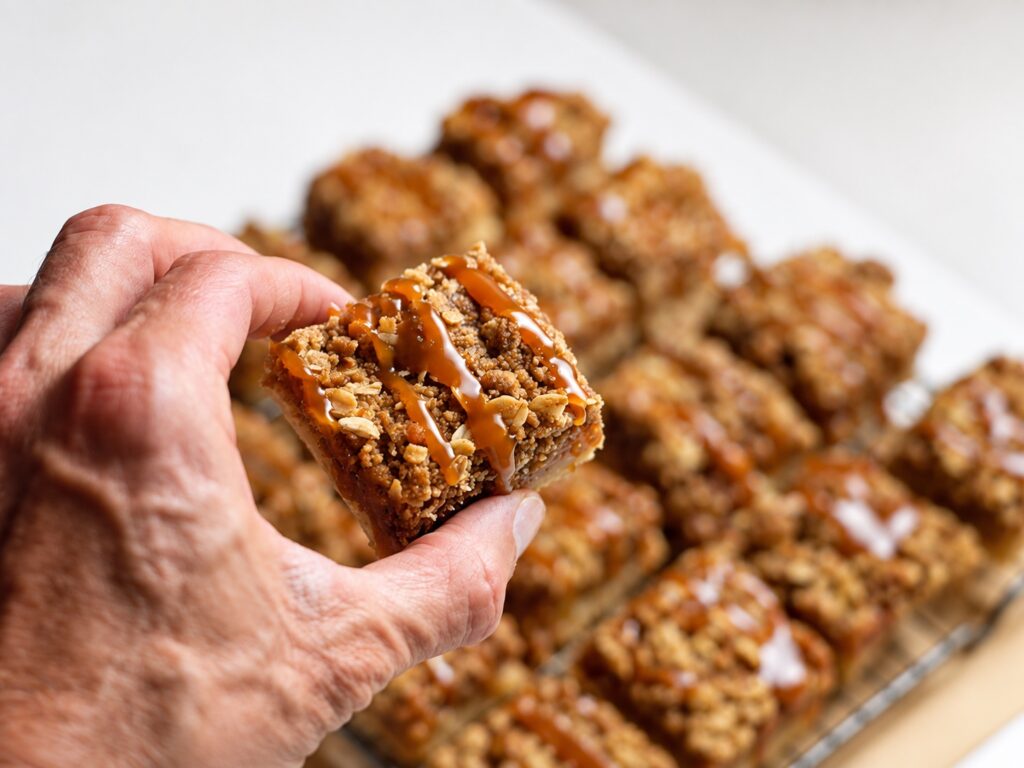
I adapted the basic structure from Sally's Salted Caramel Apple Pie Bars, but made my version with gluten-free flour throughout and Kodiak rolled oats in the crumble topping. Sally's original uses the same three-layer approach—a shortbread base, fresh apple filling, and chilled oat streusel—which is what makes these much easier to serve than a traditional apple pie.
Make them for apple-picking season, Thanksgiving, a fall dinner, or honestly anytime you want apple pie without rolling out a crust.
These are not one of my macro-friendly recipes. They're just a traditional fall dessert that happens to be gluten-free.
Try These Next
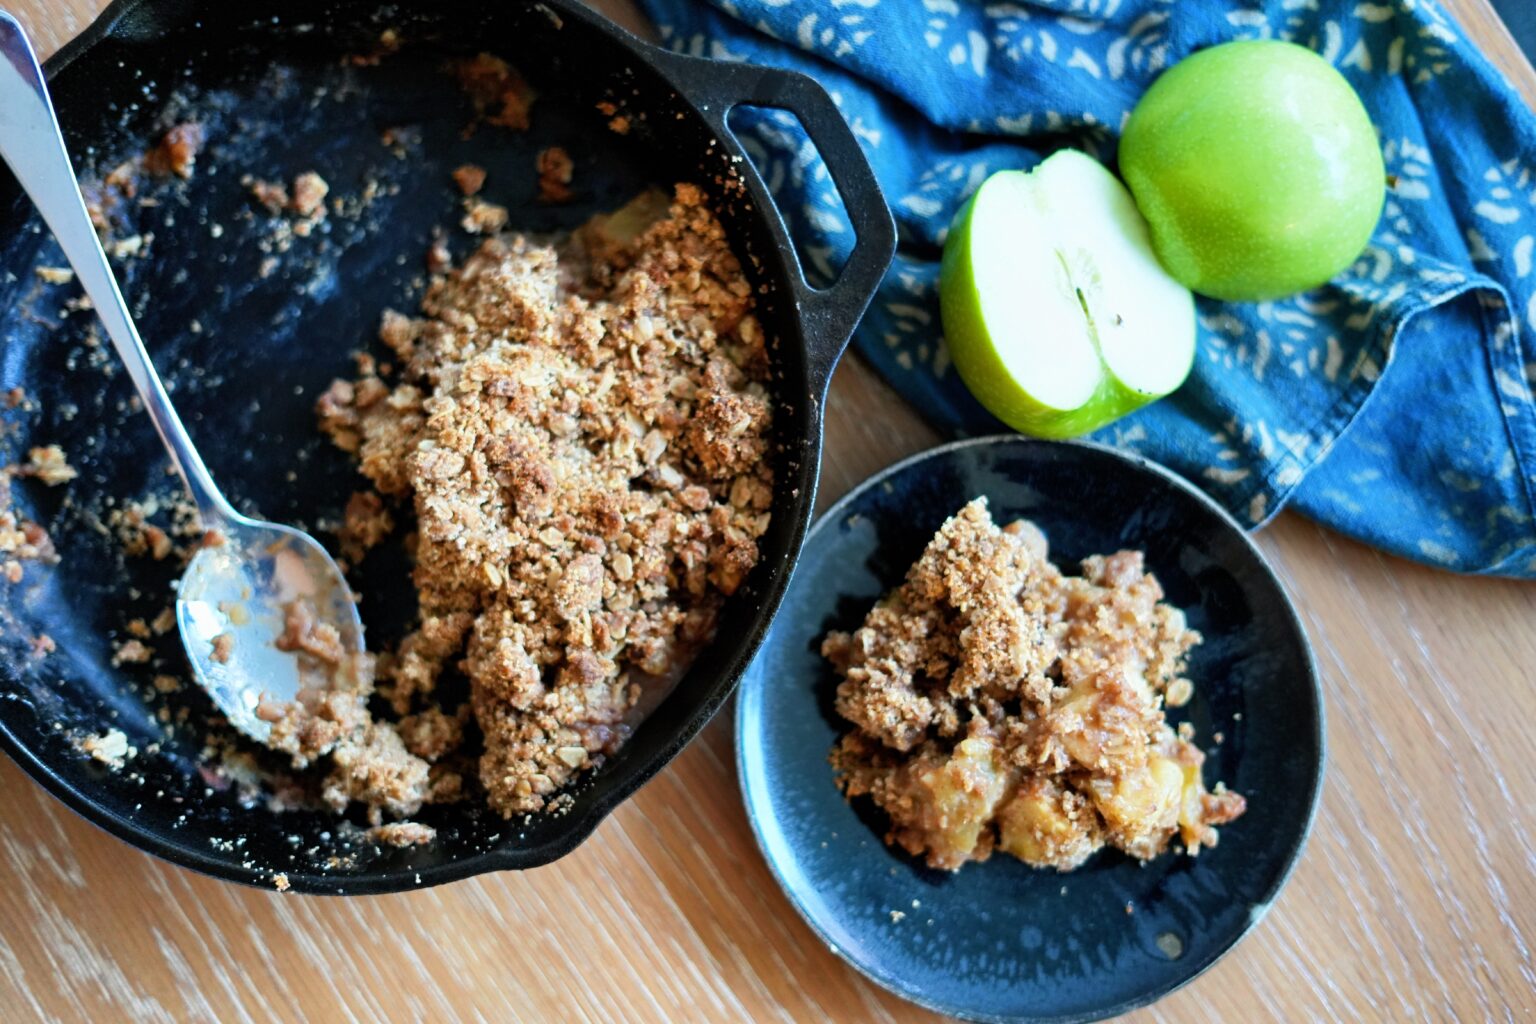
If you're already buying apples, my Gluten-Free Apple Crisp is another fall dessert built around warm spiced apples.
For a completely different apple recipe, try my Apple Pie Yogurt Bowl.
Why You'll Love These Apple Pie Bars
Gluten-free: The crust, apple filling, and streusel all use a 1:1 gluten-free flour blend instead of all-purpose flour.
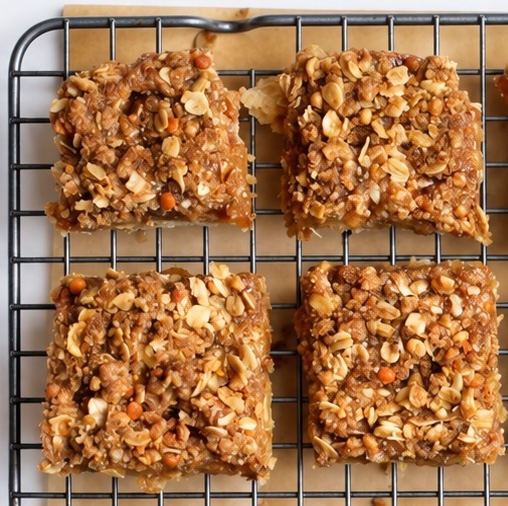
Three really different textures: You get a soft buttery crust, tender apples, and a crumbly oatmeal topping.
Easier than pie: There's no pie dough to chill, roll, crimp, or transfer.
Great for fall gatherings: Bars are much easier to cut and serve than pie when you're feeding a group.
Made with real apples: There's no canned pie filling here.
Salted caramel on top: The caramel is optional, but apple, cinnamon, brown sugar, and caramel are pretty hard to argue with.
What Are Apple Pie Bars?
Apple pie bars basically take the filling and flavors of apple pie and turn them into a layered bar dessert.
The bottom is more like shortbread than traditional pie crust.
The middle is made from sliced apples tossed with sugar, cinnamon, nutmeg, and a little flour.
Instead of adding another crust on top, you finish everything with oat streusel.
The result is somewhere between apple pie, apple crisp, and a buttery crumb bar.
And because everything is baked in an 8-inch square pan, you can lift the entire dessert out, slice it into squares, and serve it without dealing with wedges of pie falling apart.
Ingredients
Oat Streusel
- ½ cup (43g) Kodiak Classic Rolled Oats
- ⅓ cup (67g) packed light or dark brown sugar
- ¼ teaspoon ground cinnamon
- ¼ cup (31g) 1:1 gluten-free flour blend
- ¼ cup (56g) unsalted butter, cold and cubed
Gluten-Free Shortbread Crust
- ½ cup (113g) unsalted butter, melted
- ¼ cup (50g) granulated sugar
- 1 teaspoon vanilla extract
- ¼ teaspoon salt
- 1 cup + 1 tablespoon (133g) 1:1 gluten-free flour blend
Apple Filling
- 2 large apples, peeled and thinly sliced, about 2½ cups or 315g
- 2 tablespoons (16g) 1:1 gluten-free flour blend
- 2 tablespoons (25g) granulated sugar
- 1 teaspoon ground cinnamon
- ⅛ teaspoon ground nutmeg
For Serving
- Salted caramel sauce, homemade or store-bought
- Flaky sea salt, optional
Ingredient Notes
Gluten-Free Flour
Use a 1:1 gluten-free baking flour designed to replace all-purpose flour.
That matters because this recipe uses flour in three different places: the crust, the apple filling, and the streusel.
A flour made specifically for cup-for-cup baking is the easiest swap here.
Different blends can absorb butter and apple juices a little differently, so stick with one you already know works well for baking.
Kodiak Classic Rolled Oats
I used Kodiak Classic Rolled Oats in the streusel instead of standard old-fashioned oats.
I don't really think of this as a protein recipe—the oats are just the product I had and wanted to use.
They work naturally in a brown sugar crumble and give the top that classic chewy, crisp oatmeal texture.
If you need these bars to be strictly gluten-free for someone with celiac disease or a medical gluten restriction, verify that the specific oats and every other packaged ingredient you're using meet your needs.
Apples
Use firm apples that won't completely collapse in the oven.
Granny Smith, Honeycrisp, and Pink Lady are all good baking apples, and combining a tart apple with a sweeter one gives the filling a little more range. Sally also recommends firm varieties like these for the original bars.
Slice them about ¼ inch thick.
Very thick slices may not soften enough. Paper-thin slices can disappear into the filling.
Cold Butter for the Streusel
The streusel uses cold butter on purpose.
Once the butter is cut into the oats, brown sugar, cinnamon, and flour, the topping goes into the refrigerator while you make everything else.
Keeping it cold helps you get actual crumbs on top instead of a layer that melts into the apples as soon as it reaches the oven.
Salted Caramel
Homemade caramel is great, but store-bought absolutely works.
I would add it after the bars are sliced, not before chilling.
That keeps the streusel from sitting underneath a layer of caramel while you're waiting for everything to firm up.
Why This Recipe Works
The crust gets a head start in the oven before you add the apples.
That gives you a base sturdy enough to hold the fruit instead of baking everything together and hoping the bottom sets.
The apples don't need to be cooked on the stove first. They soften in the oven while the streusel browns.
And the streusel is made first and chilled while you prepare the rest of the recipe.
Those three little details are what make the layers stay distinct:
pre-baked crust + raw sliced apples + cold streusel.
Then you chill the finished bars before slicing.
That part isn't exciting, but it matters. Warm apple bars taste good, but cold, set bars are much easier to cut neatly.
Equipment
An 8-inch square pan is the size I would use here.
The source recipe is also built around an 8-inch pan, and changing to a larger pan gives you thinner layers.
You'll also need:
- Parchment paper
- Mixing bowls
- Whisk or spoon
- Pastry cutter or two forks
- Apple peeler
- Sharp knife
- Silicone spatula
- Digital kitchen scale
Tools I Use for This Recipe


Nordic Ware 8-Inch Square Pan
A suggested 8-inch square pan for keeping the crust, apple layer, and streusel at the intended thickness.

OXO Dough Blender
A suggested pastry blender for cutting cold butter into the oat streusel without warming it too much.
This post contains affiliate links. As an Amazon Associate, I earn from qualifying purchases.
How to Make Gluten-Free Apple Pie Bars
1. Make the Streusel First
In a medium bowl, combine:
- Kodiak rolled oats
- Brown sugar
- Cinnamon
- Gluten-free flour
Add the cold cubed butter.
Cut the butter into the dry mixture with a pastry cutter, two forks, or your fingers until you have coarse crumbs.
You want uneven pieces rather than a smooth paste.
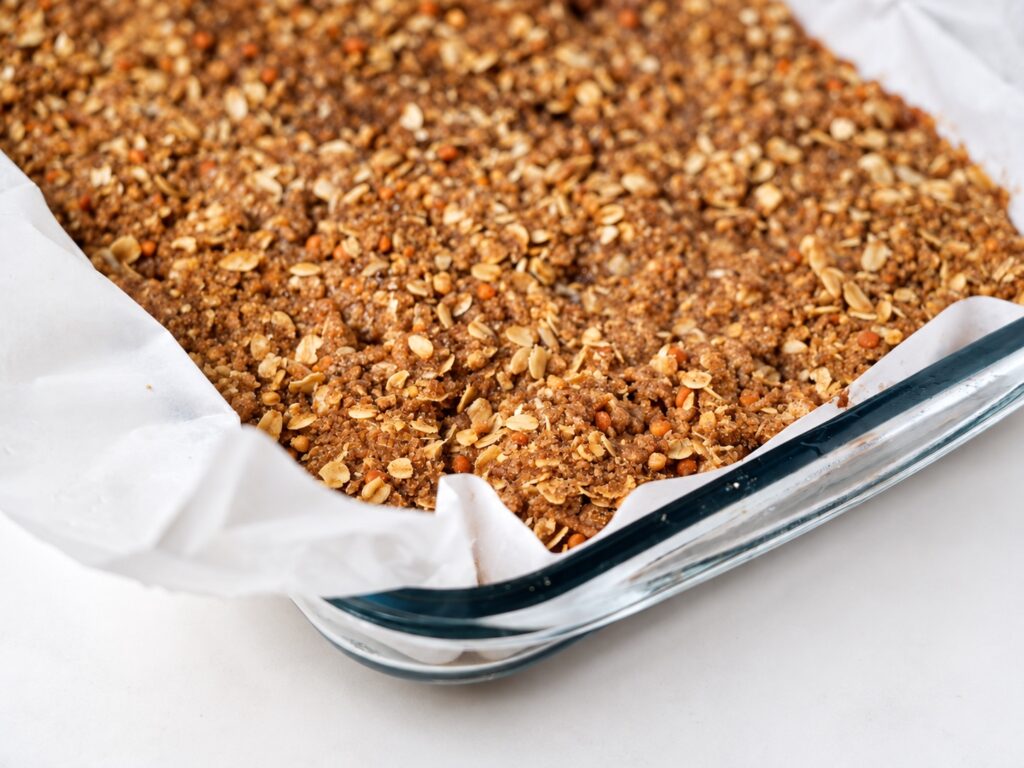
Place the streusel in the refrigerator while you make the crust and apples.
2. Prepare the Pan
Preheat the oven to 300°F.
Line the bottom and sides of an 8-inch square baking pan with parchment paper.
Leave some parchment hanging over the sides.
You'll use that overhang later to lift the entire batch out of the pan.
3. Make the Gluten-Free Shortbread Crust
Stir together the melted butter, sugar, vanilla, and salt.
Add the gluten-free flour and mix until everything comes together.
The mixture should look more like a thick, buttery cookie dough than pourable batter.
Press it evenly into the prepared pan.
Take a little time here to get the thickness reasonably even, especially in the corners.
4. Pre-Bake the Crust
Bake the crust at 300°F for 20 minutes.
You're looking for the edges to just start turning lightly golden.
It does not need to look deeply browned.
While that bakes, make the apple filling.
5. Prepare the Apples
Peel the apples and slice them about ¼ inch thick.
Add them to a large bowl with the gluten-free flour, granulated sugar, cinnamon, and nutmeg.
Toss until the slices are evenly coated.
6. Increase the Oven Temperature
When the crust comes out, increase the oven to 350°F.
Don't let the crust cool completely before assembling the bars.
7. Add the Apple Layer
Spread the apple mixture over the warm crust.
It will look like a lot of apples.
That's normal.
Layer them tightly and gently press them down so you have an even apple layer rather than one huge pile in the center.
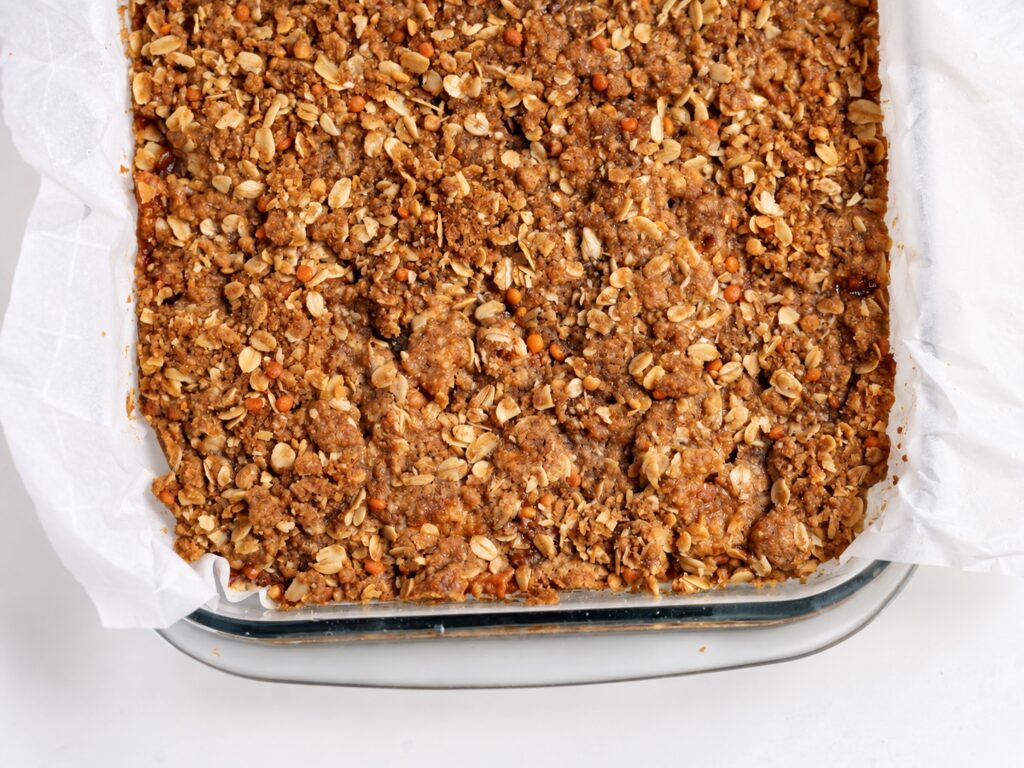
8. Add the Cold Streusel
Take the streusel out of the refrigerator.
Crumble it evenly over the apples.
Try to cover the surface, but don't pack it down.
You want loose crumbs that can brown around the edges.
9. Bake
Bake at 350°F for 30–35 minutes.
The streusel should be golden and the apples should be tender.
10. Cool, Then Chill
Let the pan cool at room temperature for at least 20 minutes.
Then transfer it to the refrigerator for at least 2 hours.
This is the part that gives you clean bars instead of warm apple crumble scooped out of a pan.
The original recipe uses the same cooling-and-chilling method specifically for cleaner slicing.
11. Slice and Add Caramel
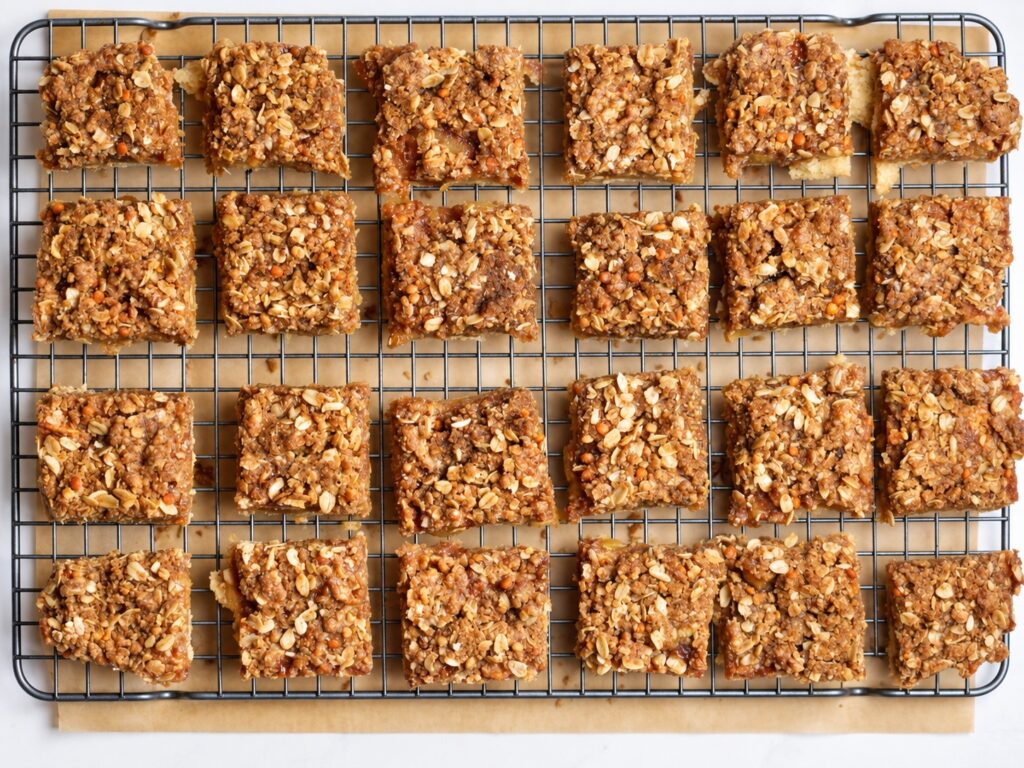
Use the parchment paper to lift the chilled bars from the pan.
Transfer to a cutting board and cut into 12–16 bars, depending on how large you want them.
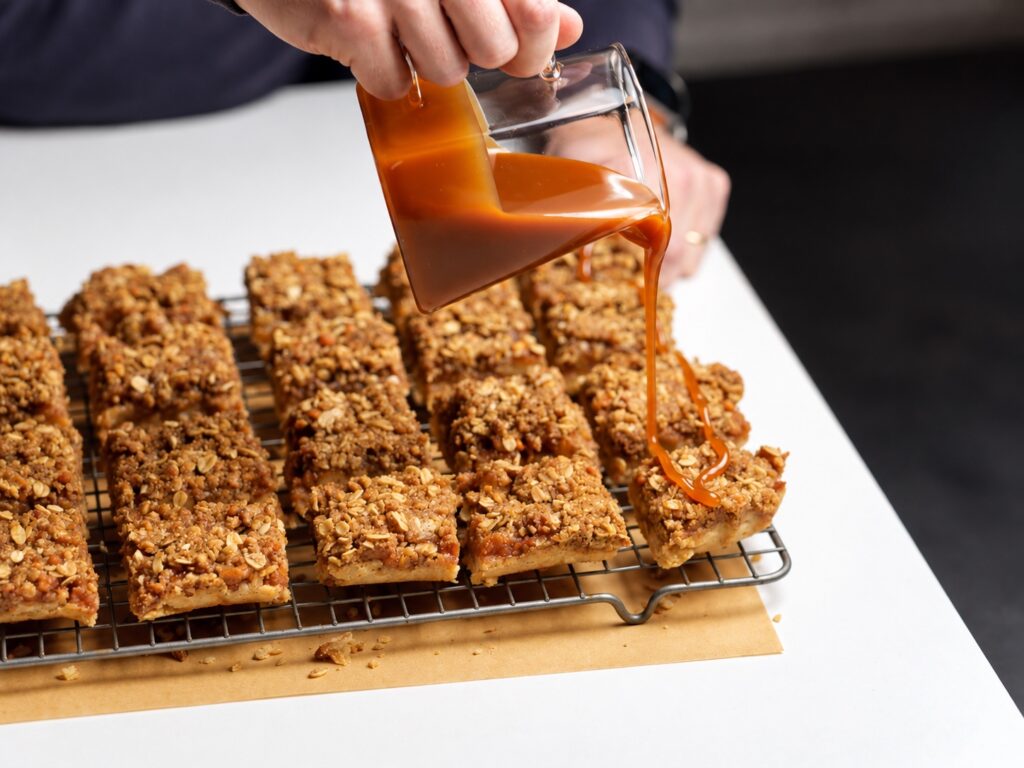
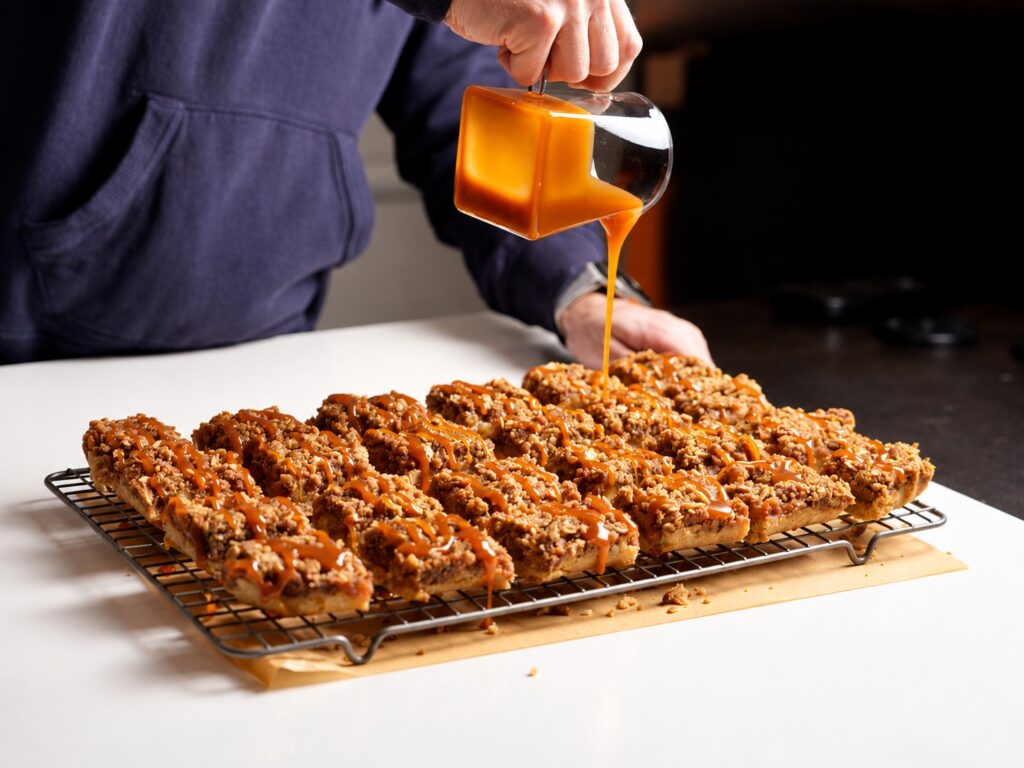
Drizzle the bars with salted caramel.
Finish with a small amount of flaky sea salt if you like the salty-sweet combination.
Expert Tips
Make the Streusel Before Anything Else
It needs time in the refrigerator.
Warm streusel butter is much more likely to melt instead of staying crumbly.
Don't Skip the Crust Pre-Bake
The shortbread crust gets 20 minutes by itself before the filling goes on.
That step is what helps it support a fairly heavy layer of apples.
Slice the Apples Evenly
You don't need laboratory precision, but try to keep them around ¼ inch.
Similar-size slices soften at roughly the same rate.
Pack the Apple Layer Down
You may think there are too many apples.
There aren't.
Arrange them tightly and press them into an even layer.
Chill Before Cutting
This is probably the hardest part if the kitchen smells like cinnamon apples.
But if presentation matters, give them the full refrigeration time.
Add Caramel at the End
Drizzle the caramel after slicing or right before serving.
It looks better and keeps the topping from becoming overly soft during storage.
Variations
Skip the Caramel
The bars still work without it.
You get more of a straight apple-crisp-meets-shortbread flavor.
Use Two Apple Varieties
Try one tart apple and one sweeter baking apple.
That gives the filling a little more contrast without changing the recipe.
Add Flaky Sea Salt
This is my favorite way to finish the caramel version.
You only need a small pinch over the top.
Make a Larger Batch
The original recipe can be doubled for a 9×13-inch pan, but the bake times change: Sally recommends pre-baking that larger crust for 18 minutes and baking the assembled bars for 45–55 minutes. I haven't independently tested the doubled gluten-free version, so I would treat those times as a starting point rather than a tested BakedLean variation.
Storage
Store the bars tightly covered in the refrigerator.
They're good cold, at room temperature, or gently warmed.
I prefer adding caramel to individual servings rather than covering the whole batch before storing it.
Freezing
For freezing, leave off the caramel.
Layer the cooled bars in a freezer-safe container with parchment between layers.
The original version can be frozen for up to 3 months and thawed overnight in the refrigerator. Because my flour substitution changes the crust, I would use that as general guidance rather than claim I've tested the full three-month freezer window myself.
Frequently Asked Questions
Are these apple pie bars gluten-free?
They're made with gluten-free flour, but check every packaged ingredient if you're baking for someone who needs strict gluten avoidance.
The oats are particularly worth verifying.
Can I use regular rolled oats instead of Kodiak oats?
Yes, standard old-fashioned rolled oats are the ingredient used in the original recipe.
I used Kodiak Classic Rolled Oats in mine.
Are these high-protein apple bars?
No.
Kodiak oats contain more protein than some oatmeal products, but I don't consider the finished dessert a high-protein recipe.
These are regular apple pie bars made with the ingredients I wanted to use.
What gluten-free flour should I use?
Use a 1:1 gluten-free baking blend intended to replace regular all-purpose flour.
I wouldn't use almond flour or coconut flour as a direct substitute because they behave completely differently.
Do I need to cook the apples first?
No.
The apples go onto the warm crust raw and cook while the assembled bars bake.
Which apples are best?
Use firm baking apples.
Granny Smith, Honeycrisp, Pink Lady, or a combination are all good options.
Can I use a 9-inch square pan?
You can physically bake the recipe in a larger pan, but the layers will be thinner.
The original recipe specifically recommends an 8-inch square pan for the intended thickness and structure.
Why did my streusel melt?
The butter may have gotten too warm.
Make the streusel first and refrigerate it while you prepare the crust and apple filling.
Why are my bars falling apart?
The most likely issue is cutting them while they're still warm.
Let them cool for at least 20 minutes and refrigerate for at least 2 hours before lifting and slicing.
Can I serve them warm?
Yes.
They'll just be softer and won't hold the same clean bar shape.
For a warm dessert, I would cut chilled bars first and then warm individual portions.
Do I have to use caramel sauce?
No.
The bars are still an apple-and-streusel dessert without it.
The caramel just pushes them further toward a caramel apple flavor.
Can I make them ahead for Thanksgiving?
Yes.
These are actually useful for Thanksgiving because they need chilling anyway.
Bake and chill them ahead, cut once set, and add caramel shortly before serving.
You Might Also Like
If you're looking for another gluten-free apple dessert, start with my Gluten-Free Apple Crisp.
For another gluten-free baking project, my Gluten-Free Chocolate Tart Crust is a useful recipe to have when you want something more pastry-style.
And for another fall bake, try my Gluten-Free Maple Pumpkin Muffins.
Final Thoughts
I like these because they feel like apple pie without asking me to actually make a pie.
You still get the buttery bottom crust, a thick cinnamon apple filling, a crumbly oat topping, and caramel if you want it.
My two swaps—gluten-free flour and Kodiak Classic Rolled Oats—don't change what the dessert is supposed to be.
It's still a classic fall apple bar.
Give the streusel time to chill, pre-bake the crust, really pack in those apples, and most importantly, let the finished bars chill before you cut them.
Gluten-Free Apple Pie Bars
Ingredients
- 1/2 cup Kodiak Classic Rolled Oats 43g
- 1/3 cup light or dark brown sugar 67g, packed
- 1/4 teaspoon ground cinnamon
- 1/4 cup 1:1 gluten-free flour blend 31g
- 1/4 cup unsalted butter 56g, cold and cubed
- 1/2 cup unsalted butter 113g, melted
- 1/4 cup granulated sugar 50g
- 1 teaspoon vanilla extract
- 1/4 teaspoon salt
- 1 cup + 1 tablespoon 1:1 gluten-free flour blend 133g
- 2 large apples peeled and sliced 1/4 inch thick, about 2 1/2 cups or 315g
- 2 tablespoons 1:1 gluten-free flour blend 16g
- 2 tablespoons granulated sugar 25g
- 1 teaspoon ground cinnamon
- 1/8 teaspoon ground nutmeg
- salted caramel sauce homemade or store-bought, for drizzling
- flaky sea salt optional
Equipment
- 8-inch Square Baking Pan
- Pastry Cutter or Two Forks
Method
- Make the streusel first. Combine the Kodiak rolled oats, brown sugar, cinnamon, and gluten-free flour in a medium bowl.
- Cut in the cold cubed butter until the mixture resembles coarse crumbs. Refrigerate the streusel while preparing the crust and apple filling.
- Preheat the oven to 300°F. Line the bottom and sides of an 8-inch square baking pan with parchment paper, leaving enough overhang to lift the bars out later.
- For the crust, stir together the melted butter, granulated sugar, vanilla extract, and salt. Add the gluten-free flour and mix until combined.
- Press the crust mixture evenly into the prepared pan. Bake at 300°F for 20 minutes, or until lightly golden around the edges.
- While the crust bakes, toss the sliced apples with the gluten-free flour, granulated sugar, cinnamon, and nutmeg until evenly coated.
- Remove the crust from the oven and increase the temperature to 350°F.
- Layer the apple mixture tightly over the warm crust and gently press into an even layer.
- Remove the streusel from the refrigerator and crumble it evenly over the apples without packing it down.
- Bake at 350°F for 30–35 minutes, or until the streusel is golden and the apples are tender.
- Cool the bars at room temperature for at least 20 minutes, then refrigerate for at least 2 hours.
- Use the parchment overhang to lift the chilled bars from the pan. Transfer to a cutting board and cut into 12–16 bars.
- Drizzle with salted caramel sauce and finish with flaky sea salt, if desired.
Notes
Tried this recipe?
Mention or tag @bakedlean!One response to “Gluten-Free Apple Pie Bars with Oat Streusel”


100% A++++ these are so good. I highly recommend you try to make these.

Leave a Reply