When you start eating for performance, you realize quickly that dessert is often the first thing to go. Most “healthy” alternatives on the market are just glorified sugar bombs in disguise, or worse, they taste like chalk. I spent years trying to create the perfect low carb cheesecake recipe that actually satisfies, without the guilt and without the sugar crash. This High-Protein Keto Cheesecake is the result of that obsessive testing. It delivers a massive protein punch per slice, creates a density that mimics a traditional New York-style slice, and—most importantly—it actually tastes good.
The success of this low carb cheesecake relies on two technical pillars: the protein blend and the structural integrity of the crust.
The Whey/Casein Blend: Many people attempt to bake with 100% Whey Isolate, which results in a rubbery, dry, or chalky mess. Whey is fast-absorbing and lacks the structural integrity needed for a baked good that relies on fat and protein for its set. You must use a Whey/Casein blend. The casein component provides a thicker, more stable structure that mimics the density of traditional cream cheese. I exclusively use PE Science protein (use code BAKEDLEAN) because their formula is specifically optimized for baking. It ensures the cheesecake remains moist and dense, not rubbery.
The Importance of the Crust: I am frequently asked if you can use almond meal. The answer is no. Almond meal—which contains the skins of the almonds—is far too coarse and produces a gritty, inconsistent crust. You need fine, blanched almond flour. If you use almond meal, you are setting yourself up for a crust that feels sandy on the tongue rather than like a classic graham cracker base. Stick to blanched, superfine flour for the best possible results.
The Water Bath Technique: When baking a cheesecake, the eggs act as the binder. If the oven temperature is too high or fluctuates, the eggs curdle, causing the cheesecake to crack and become grainy. Placing your pan in a water bath creates a gentle, humid environment that keeps the temperature stable throughout the baking process, resulting in a smooth, silky texture.
Why You'll Love This Recipe
Macro-Efficient: You get a legitimate dessert experience with significantly higher protein content than standard versions, keeping you satiated longer and preventing late-night snacking.
Low Carb Compliance: At 5g net carbs per slice, this fits seamlessly into a strict keto diet without causing insulin spikes.
Professional Texture: The combination of a slow-bake and a water bath ensures a restaurant-quality, crack-free finish every time.
Prep-Friendly: This dessert holds up exceptionally well in the fridge. It tastes better on day two, making it an ideal choice for weekly meal prep.
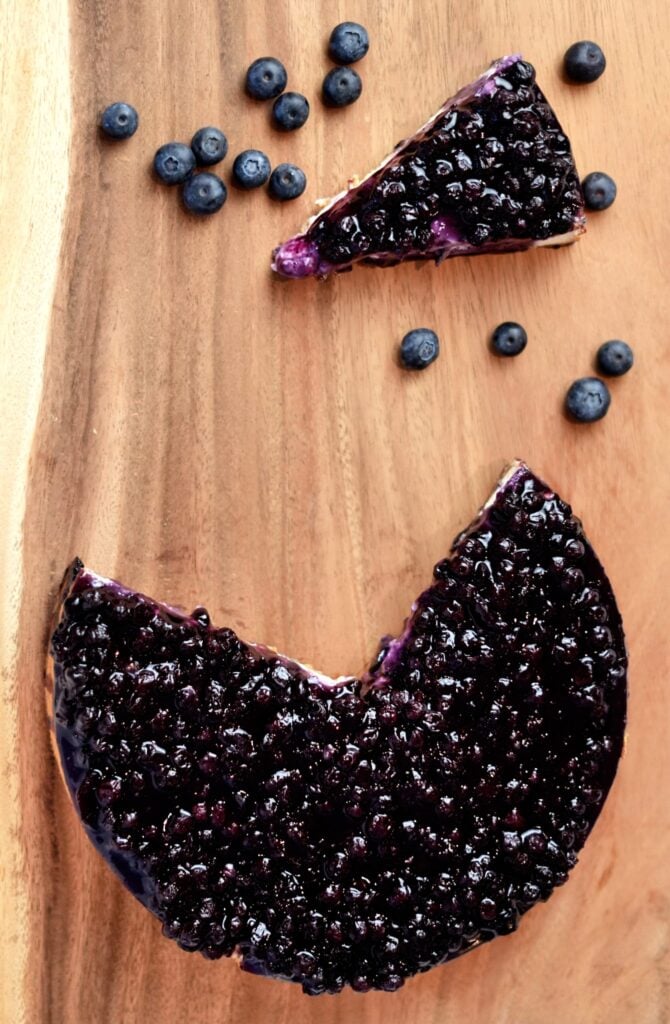
Versatile Topping Options: While delicious plain, this cheesecake pairs perfectly with fresh berries like raspberries or strawberries, which add flavor without disrupting your macros.
Equipment Deep Dive: Mixing Methods
You do not need a professional kitchen to make a bakery-quality cheesecake. However, you do need to understand how your tools affect the final product.
Springform Pan: This is non-negotiable. You need a reliable 9-inch Springform Pan to release the cheesecake without damaging the delicate sides. Trying to extract a cheesecake from a standard cake pan will almost always result in a broken crust.
Stand Mixer: This is the ideal tool for a cheesecake. It allows for consistent speed control. Use a Stand Mixer on low speed to incorporate ingredients without whipping excess air into the cream cheese. Excess air leads to a cheesecake that rises like a soufflé and then collapses, causing cracks.
Food Processor: This is my preferred tool for the keto cheesecake crust. You can use a Food Processor to pulverize your premade graham cracker crust into a fine, uniform crumb. If you run it on high for too long, you will introduce too much air, which ruins the dense texture we want in the filling.
Blender: You can use a high-powered Beast Blender, but proceed with extreme caution. Because a blender is designed to create a vortex and incorporate high amounts of air, you must only pulse the mixture. If you blend the filling on high, your cheesecake will come out airy and mousse-like rather than rich and dense. If you choose this route, pulse only until just combined.
Heavy Bottom Saucepan: You need a high-quality Heavy Bottom Sauce Pan to reduce the blueberry sauce. A heavy bottom prevents the berries from scorching and ensures the cornstarch slurry cooks out properly, leaving you with a smooth glaze rather than a raw, starchy taste.
Sweeteners, Xylitol, and Sugar Alcohols
Understanding how to sweeten your dessert is just as important as the protein you use.
The Role of Sugar Alcohols: Ingredients like xylitol and erythritol are sugar alcohols. They are not metabolized by the body like traditional sugar, which is why they work for keto. However, they behave differently than sucrose in the oven. Xylitol, for example, has a very similar flavor profile to sugar, but it can have a “cooling” sensation on the tongue.
Choosing Your Sweetener: For the best results, I recommend a blend. Pure xylitol is excellent for flavor, but it is toxic to dogs—if you have pets, keep this far away. Erythritol is safer but can crystallize if the cheesecake is stored in the freezer for too long. A powdered erythritol/monk fruit blend is the gold standard for this recipe because it dissolves completely into the cream cheese and doesn't crystallize.
2 tbsp Cornstarch (made into a slurry with 2 tbsp water)
High-Protein Keto Cheesecake Step by Step Instructions
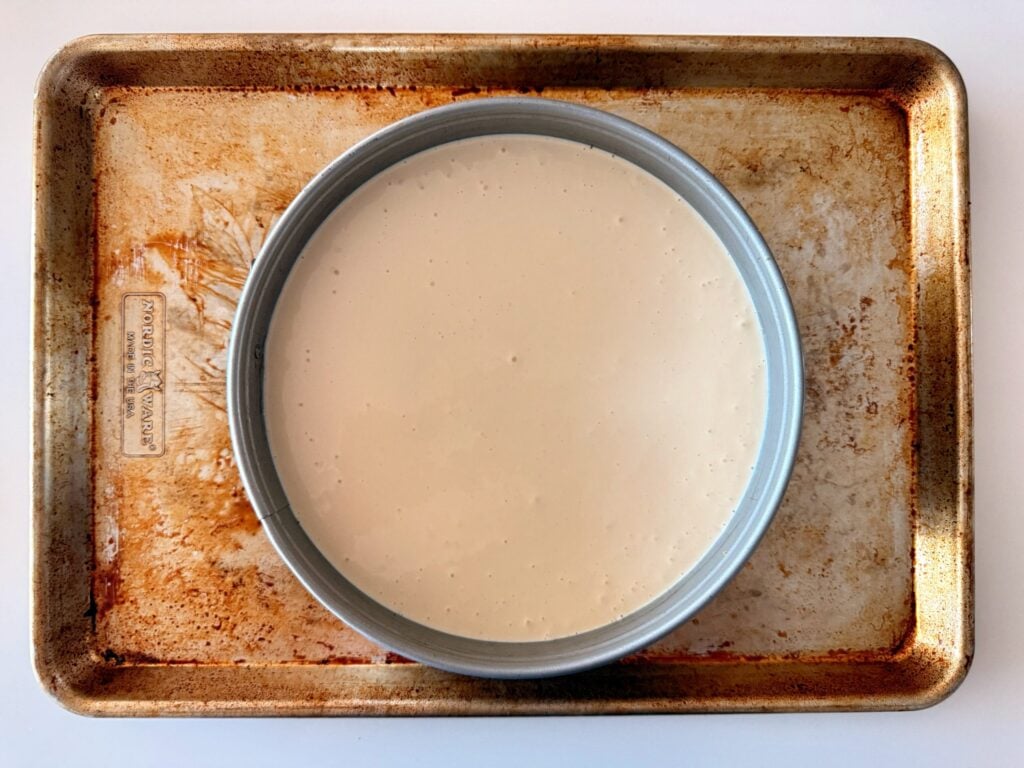
1. Prepare the equipment: Preheat your oven to 325°F (163°C). Line the bottom of your 9 Inch Spring Form Pan with parchment paper and grease the sides.
Pro Tip: If you are using a water bath, wrap the bottom and sides of your springform pan tightly in two layers of heavy-duty aluminum foil to prevent water from leaking into the crust.
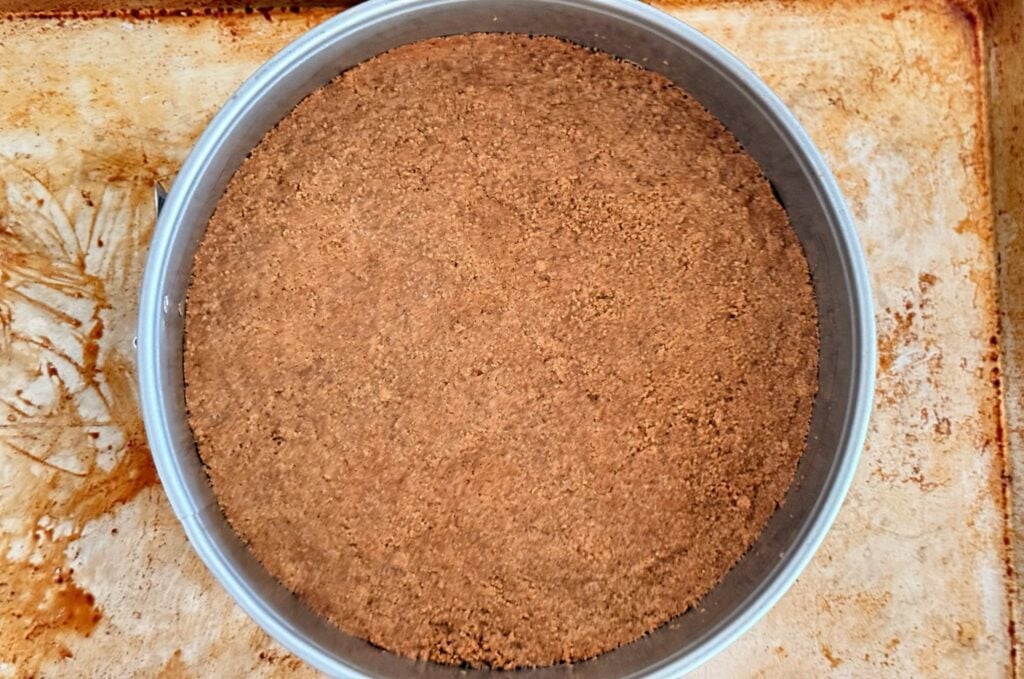
2. Form the crust: In a medium bowl, combine the blanched almond flour, powdered erythritol, and salt. Add the melted butter, egg whites, and vanilla, stirring until the mixture comes together into a dough. Press the mixture firmly into the bottom of the springform pan. Bake for 10–12 minutes until lightly golden. Remove from the oven and let it cool completely.
Pro Tip: The egg whites are the secret weapon here; they act as a binder that replaces the structural fat usually provided by higher butter amounts, ensuring your crust doesn't crumble when sliced.
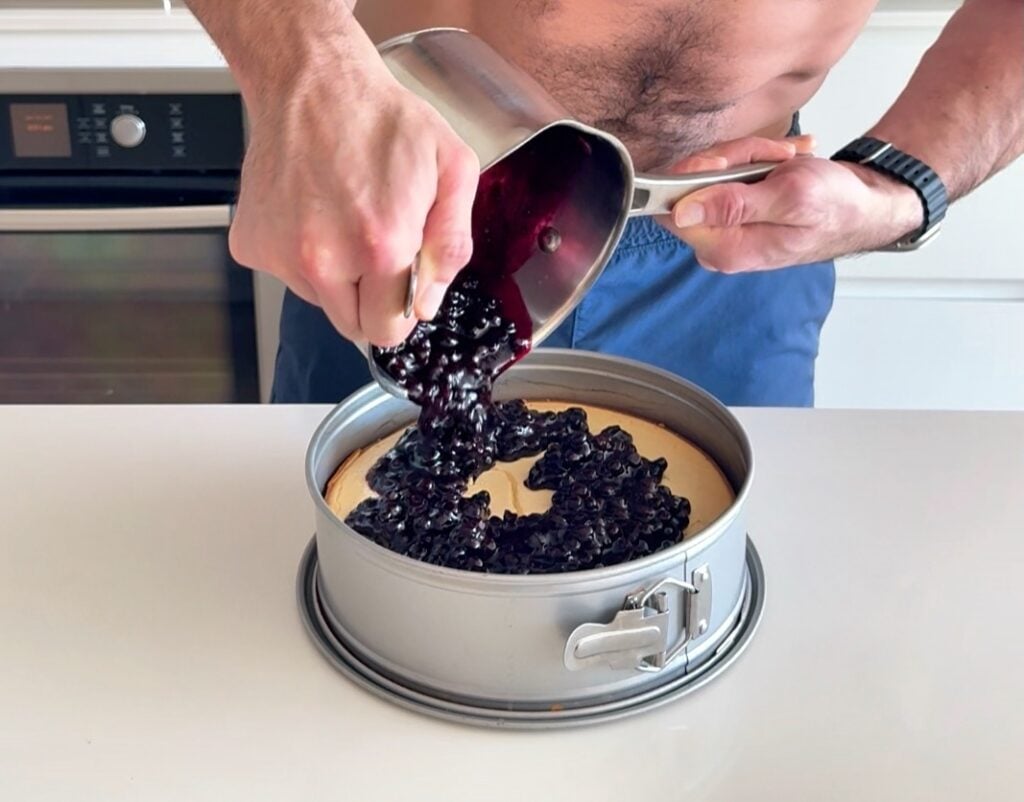
3. Prepare the blueberry sauce: In a Heavy Bottom Sauce Pan, combine frozen blueberries and monk fruit sweetener. Cook over medium heat until the berries release their juices and begin to break down. Stir in the cornstarch slurry and continue to cook for 2-3 minutes until thickened and glossy. Remove from heat and let it cool.
Pro Tip: Ensure your cornstarch slurry is fully mixed (no lumps) before adding it to the hot berries to ensure a smooth, restaurant-quality sauce.
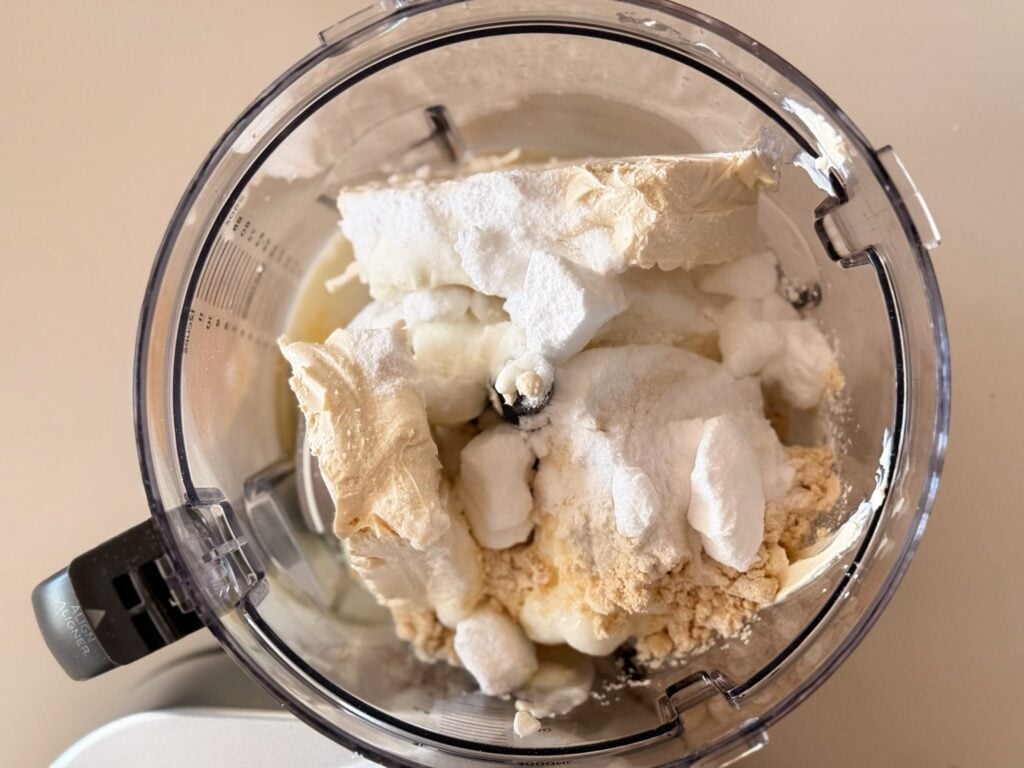
4. Mix the filling: In a large mixing bowl, beat the softened low-fat cream cheese until it is completely smooth. Add the powdered erythritol and beat again until fully incorporated.
Pro Tip: Cream cheese must be at room temperature. If it is cold, you will get small lumps in the filling that are impossible to fix.
5. Add protein and starch: Mix in the PE Science protein powder and the cornstarch on low speed. Once combined, add the eggs one at a time, mixing gently after each addition. Finally, add the Greek yogurt, 1% milk, lemon juice, vanilla, and salt. Mix just until smooth—do not over-whip.
Pro Tip: The cornstarch is essential when using lower-fat dairy. It ensures a stable set and prevents the “weeping” that can occur in low-fat bakes. Mix carefully to avoid over-aerating the batter.
6. Bake the cheesecake: Pour the filling over the cooled crust. If using a water bath, place the pan into a larger roasting pan and add boiling water until it reaches halfway up the side of the springform pan. Bake for 50–60 minutes. The edges should be set, but the center should still have a slight jiggle.
Pro Tip: Turn the oven off and crack the door open, letting the cheesecake cool inside for 1 hour. This gradual temperature change is the best way to prevent cracks.
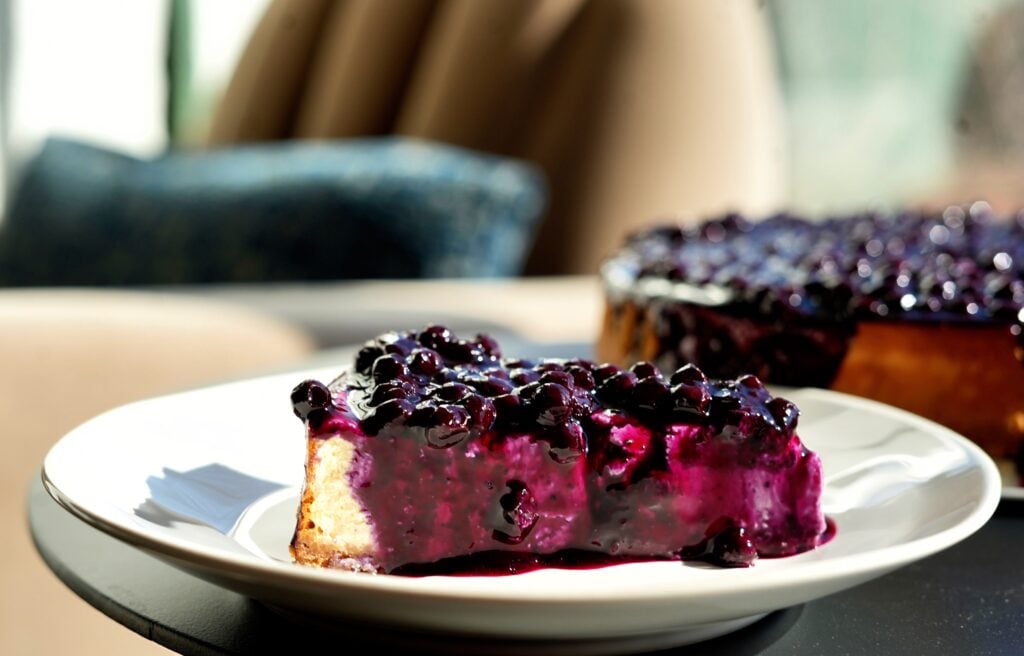
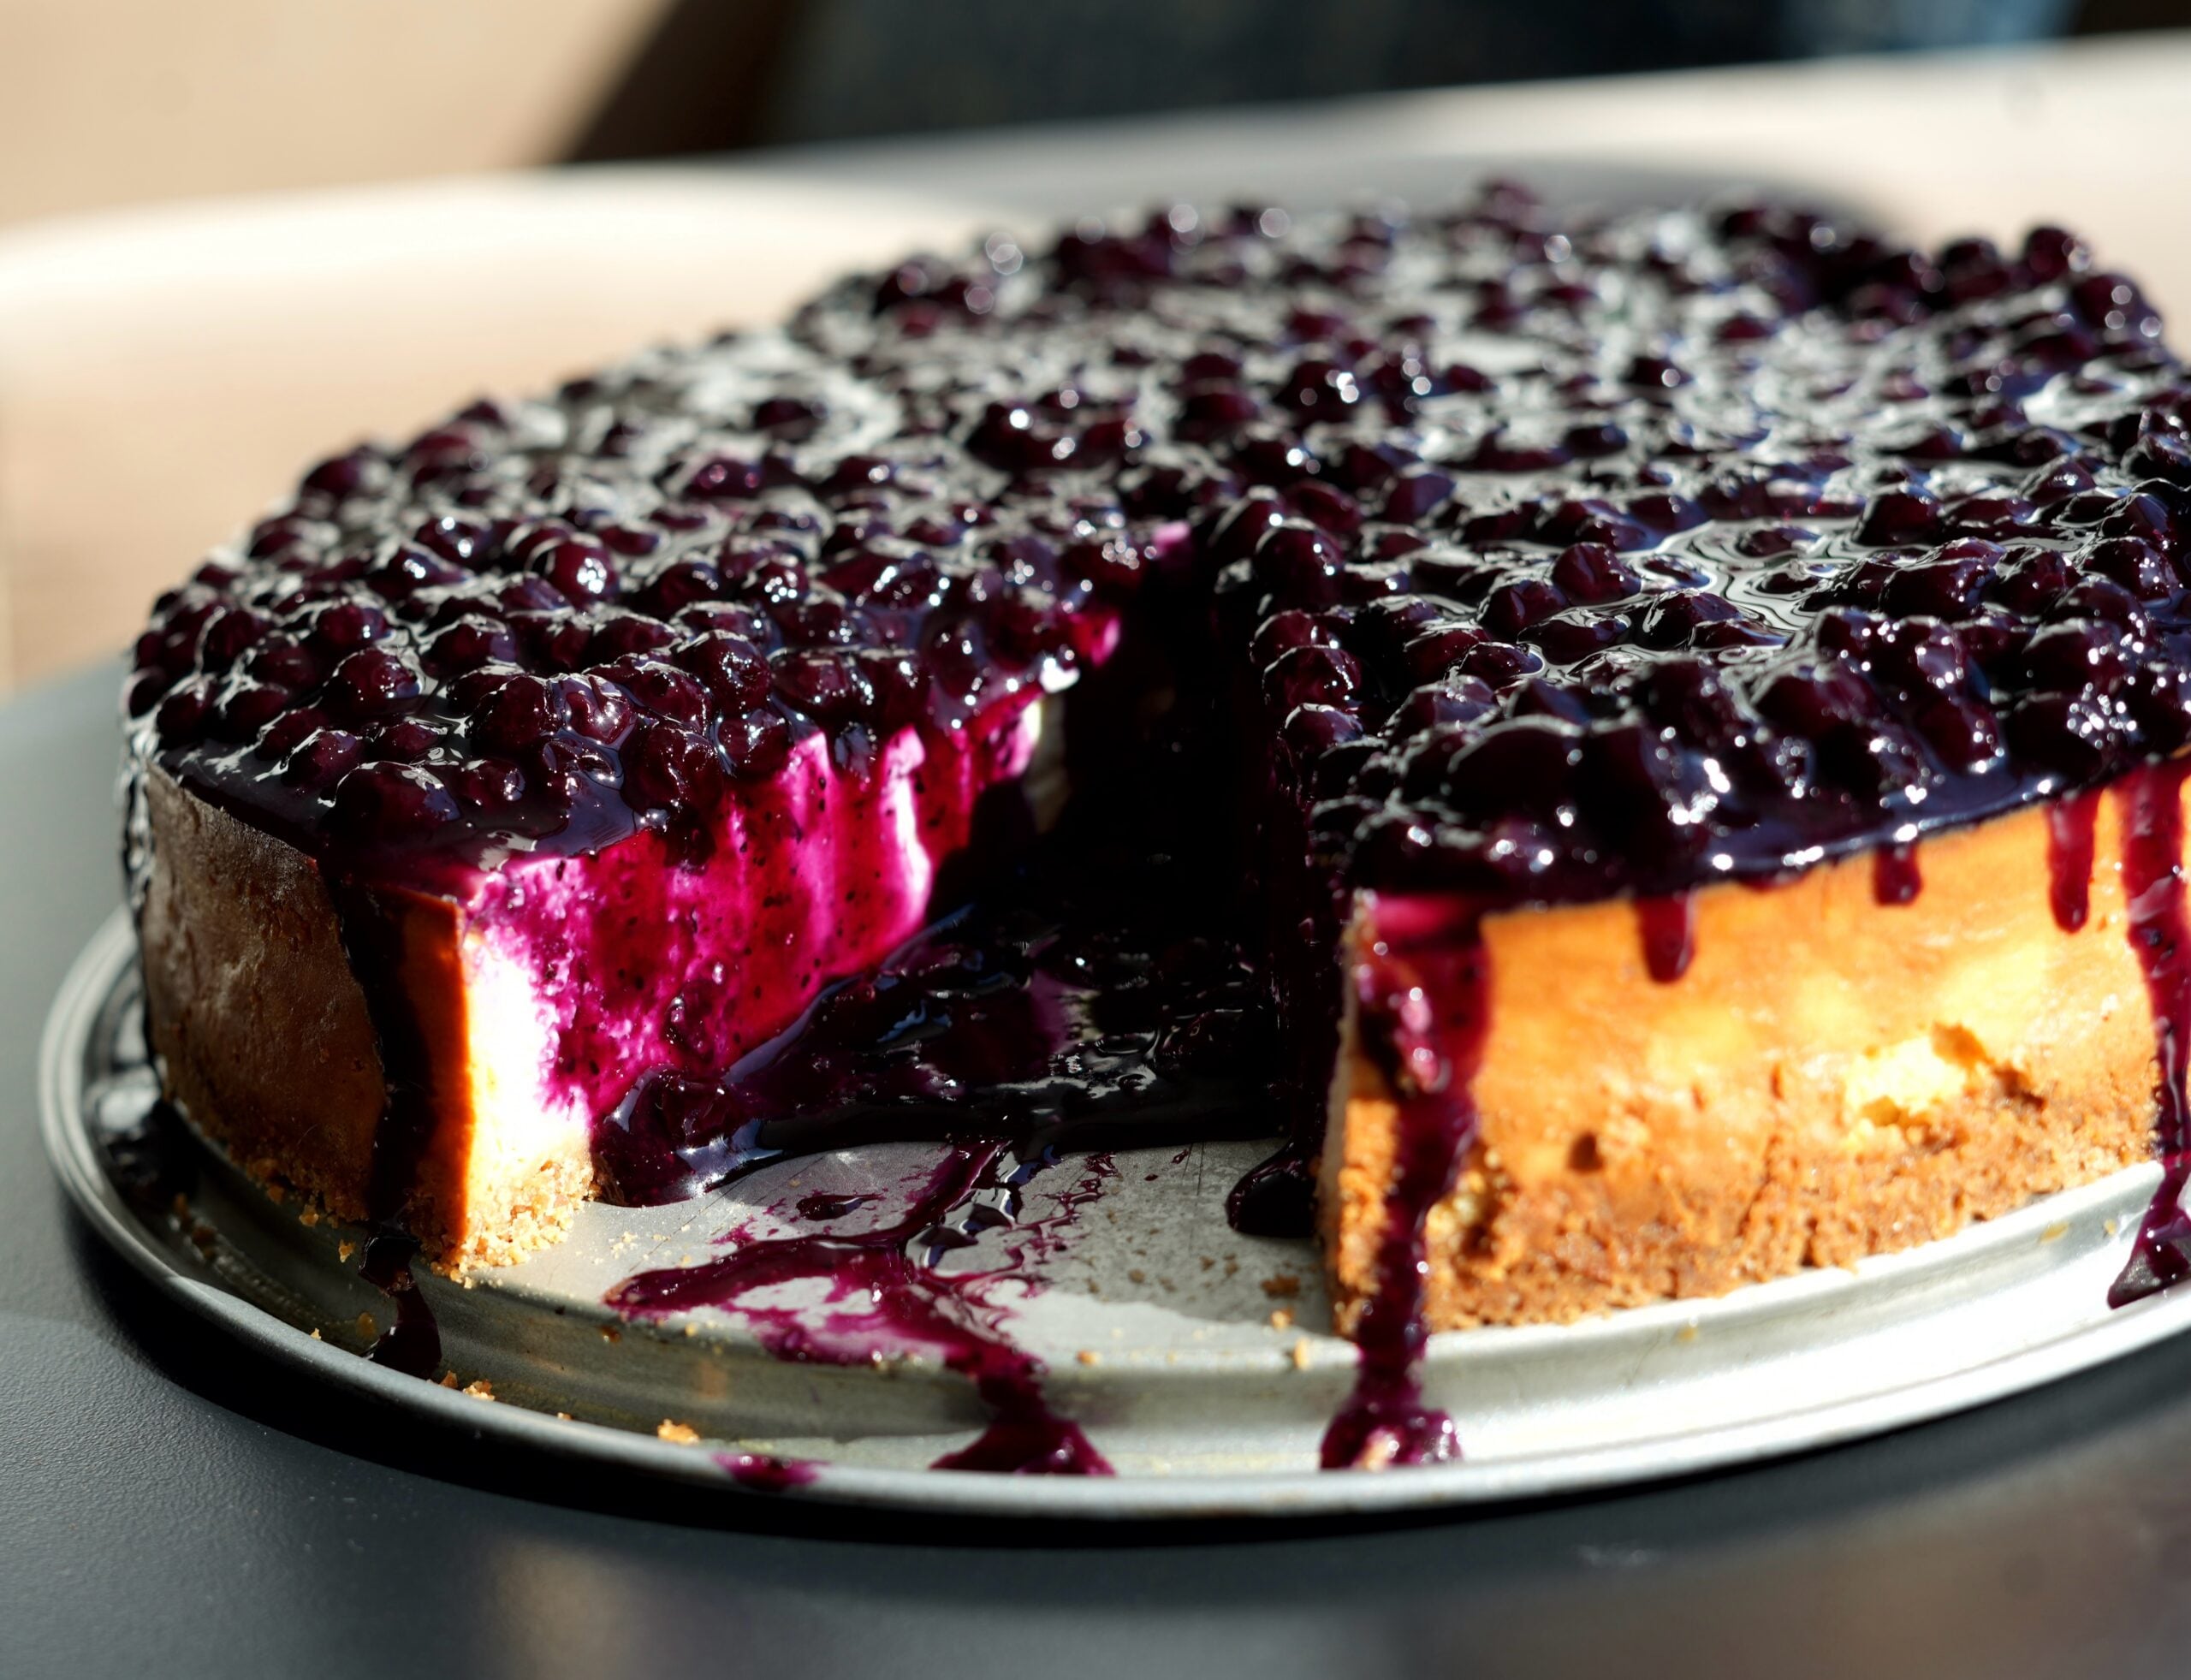
7. Chill and Serve: Refrigerate for at least 4 hours, though overnight is preferred. Top with the cooled blueberry sauce just before serving.
Troubleshooting & FAQ
Is cheesecake ok on keto?
Yes. Traditional cheesecake contains sugar and flour, but by substituting those with erythritol and almond flour, you create a dessert that is low in carbohydrates and high in fat and protein, making it perfectly suitable for a keto diet.
What are common mistakes when baking keto cheesecake?
The most common mistakes are using cold ingredients (which leads to lumps), over-mixing the batter (which adds air bubbles and causes cracks), and removing the cheesecake from the oven too early or too late. Always aim for a “jiggly” center when you pull it out. Then you have one of the best keto desserts.
What can I substitute for sugar in cheesecake?
For the best results, use powdered erythritol or an allulose blend. Avoid granulated sweeteners as they can leave a gritty texture, and never use liquid sweeteners like pure stevia, as they lack the bulk needed for the structure of the cheesecake.
Why does no-bake cheesecake taste different?
No-bake cheesecake relies on the fats in cream cheese to “set” in the fridge, often resulting in a lighter, mousse-like texture. Baked cheesecake uses eggs to coagulate proteins, resulting in a dense, rich, and classic New York-style texture.
What causes a no-bake cheesecake to not set?
Usually, this is due to insufficient chilling time or the ratio of cream cheese to other ingredients. If the mixture is too loose, it will never firm up. Always stick to the recommended refrigeration time.
How do I know if the cheesecake is done?
The edges should look set and puffed, but the center should still wobble like gelatin when you gently shake the pan. The residual heat will finish cooking the center as it cools.
Substitutions Table
Component
Swap Options
Almond Flour
Sunflower seed flour (1:1 ratio) and other gluten free flours
Cream Cheese
Full-fat Greek yogurt (will be tangier) or full fat cream cheese.
Sweetener
Monk fruit blend (1:1 ratio) or other powdered sweeteners.
Butter
Ghee or refined coconut oil
Storage & Reheating
Fridge: Store in an airtight container for up to 5 days, just like a classic cheesecake.
Freezer: Wrap tightly in plastic wrap followed by aluminum foil. It freezes for up to 3 months. Thaw in the fridge overnight.
Reheating: Serve chilled. This cake is a cold dessert; do not attempt to reheat it.
This is the only keto cheesecake recipe you need. It hits the protein macros, kills the dessert cravings, and looks like a professional bakery-style creation. Make it once, and you'll stop buying store-bought versions for good. Save the recipe card below!
High-Protein Blueberry Keto Cheesecake
5 from 1 vote
A rich, creamy, and macro-friendly cheesecake that packs high protein per slice. Featuring a stabilized lower-fat profile and a homemade blueberry reduction.
Tip: Always use a Whey/Casein blend for the protein powder to avoid a rubbery texture. The cornstarch provides crucial stability for this lower-fat recipe.